Why Wix Chatbot?
Adding a chatbot to your Wix website enhances user engagement, automates customer interactions, and improves conversions. Here’s why you should integrate a chatbot on Wix:- Seamless Integration: Wix allows smooth chatbot installation without complex coding, making it easy for non-technical users.
- 24/7 Automated Support: Provide instant responses to customer queries, even outside business hours, ensuring better user experience.
- Improved Lead Generation: Capture visitor details, qualify leads, and guide them through the sales funnel without manual intervention.
- Enhanced User Engagement: Engage visitors with personalized messages, FAQs, and interactive flows to keep them on your site longer.
How to Create your Wix Chatbot?
Section A: Setting up Convertalk and Wix:
-
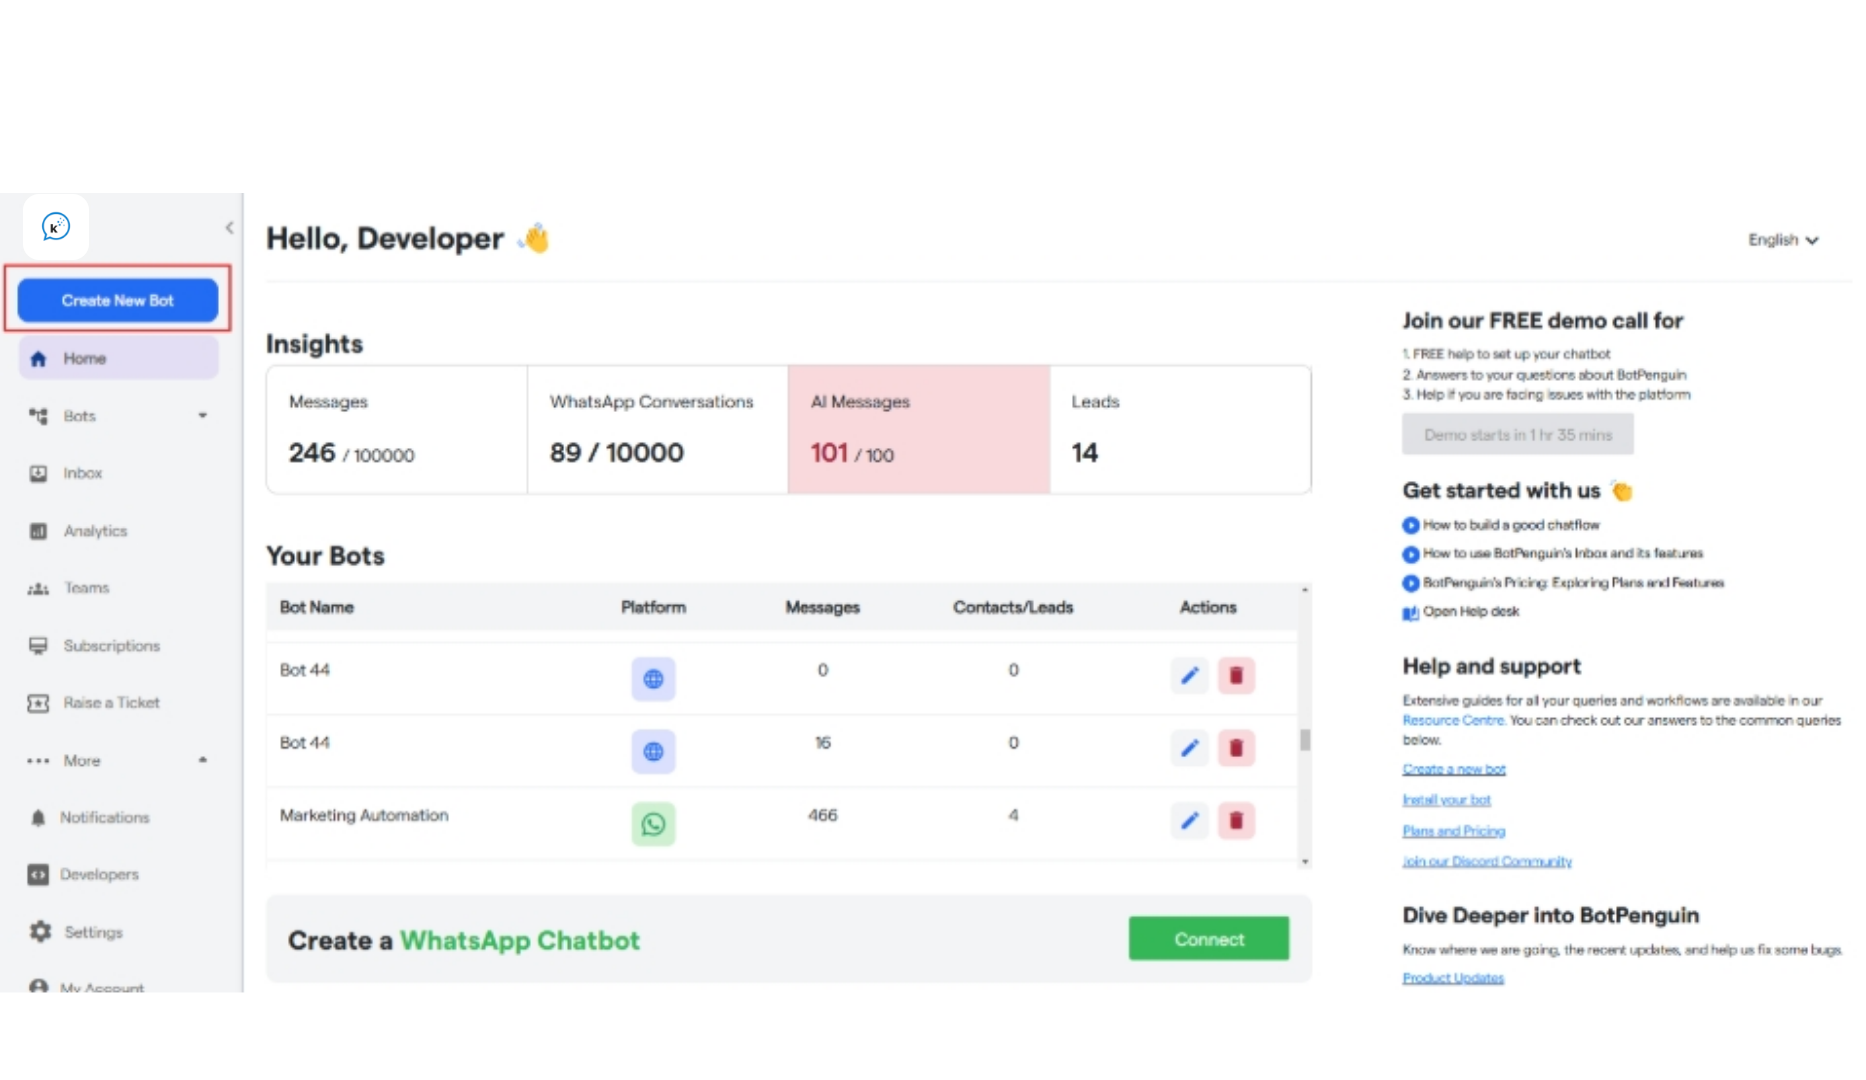
We first need to create the chatbot that will be installed on Wix. To start creating your new chatbot, click “Create New Bot.”
-
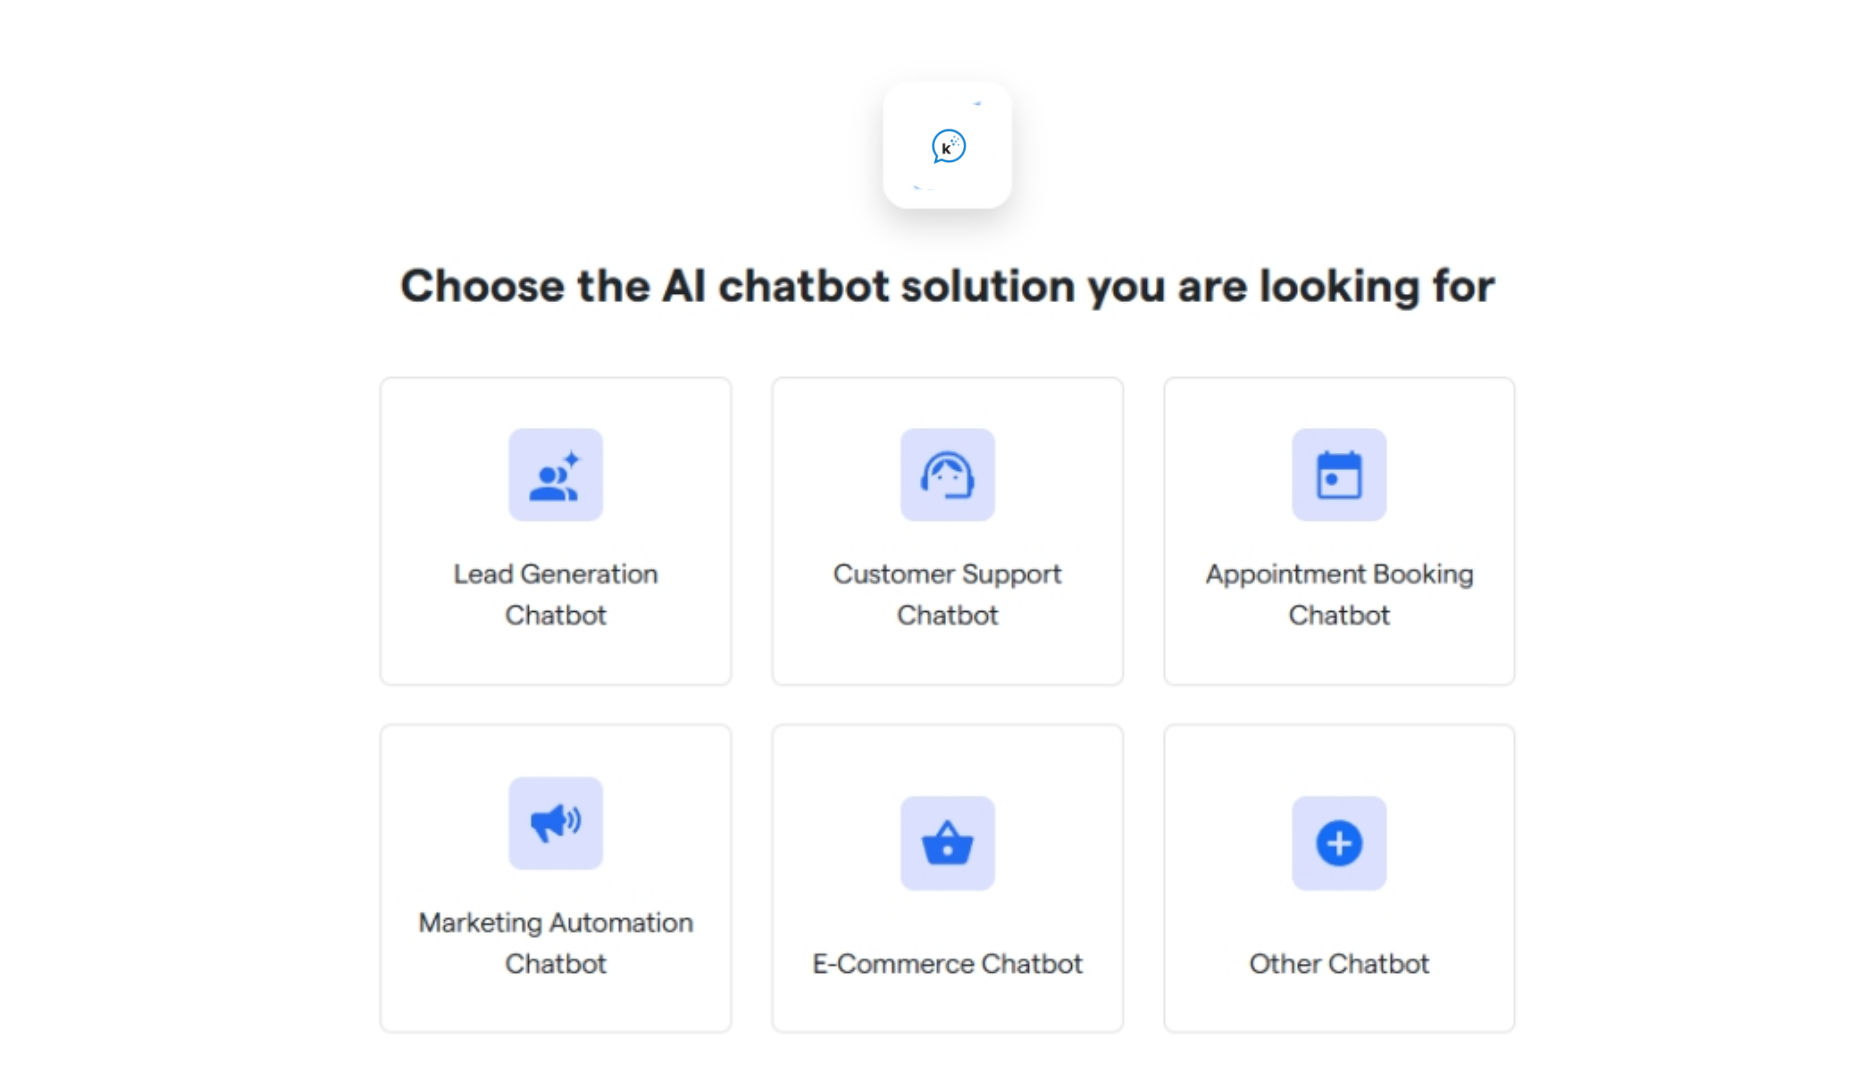
Select the primary purpose for creating your bot and proceed further.
-
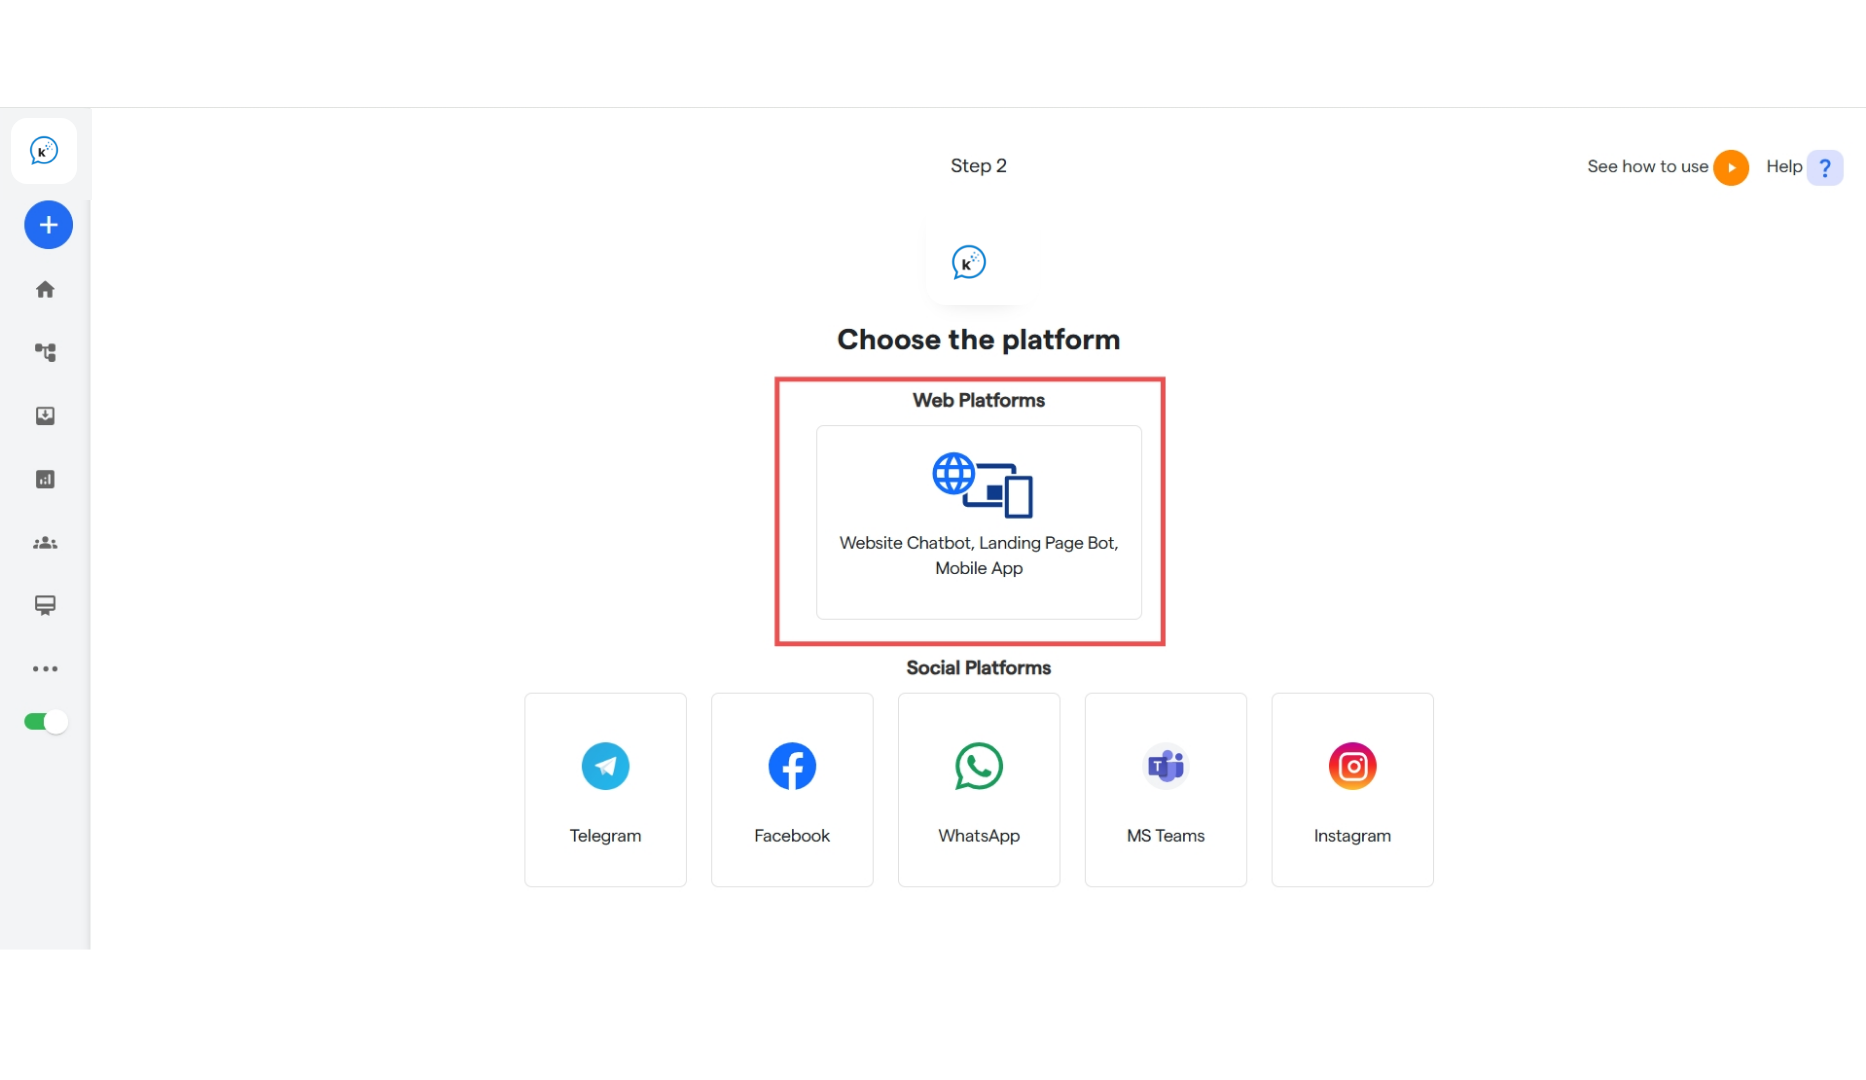
Select the platform: “Website Chatbot”.
- Your bot has been successfully created! Edit the flow using the instructions on [Website Chatbot](https://help. Convertalk.com/ Convertalk-resource-centre/how-botpenguin-works/create-new-chatbot/website-chatbot).
- Now you need to deploy this chatbot to your Wix website.
How to Install your chatbot on Wix?
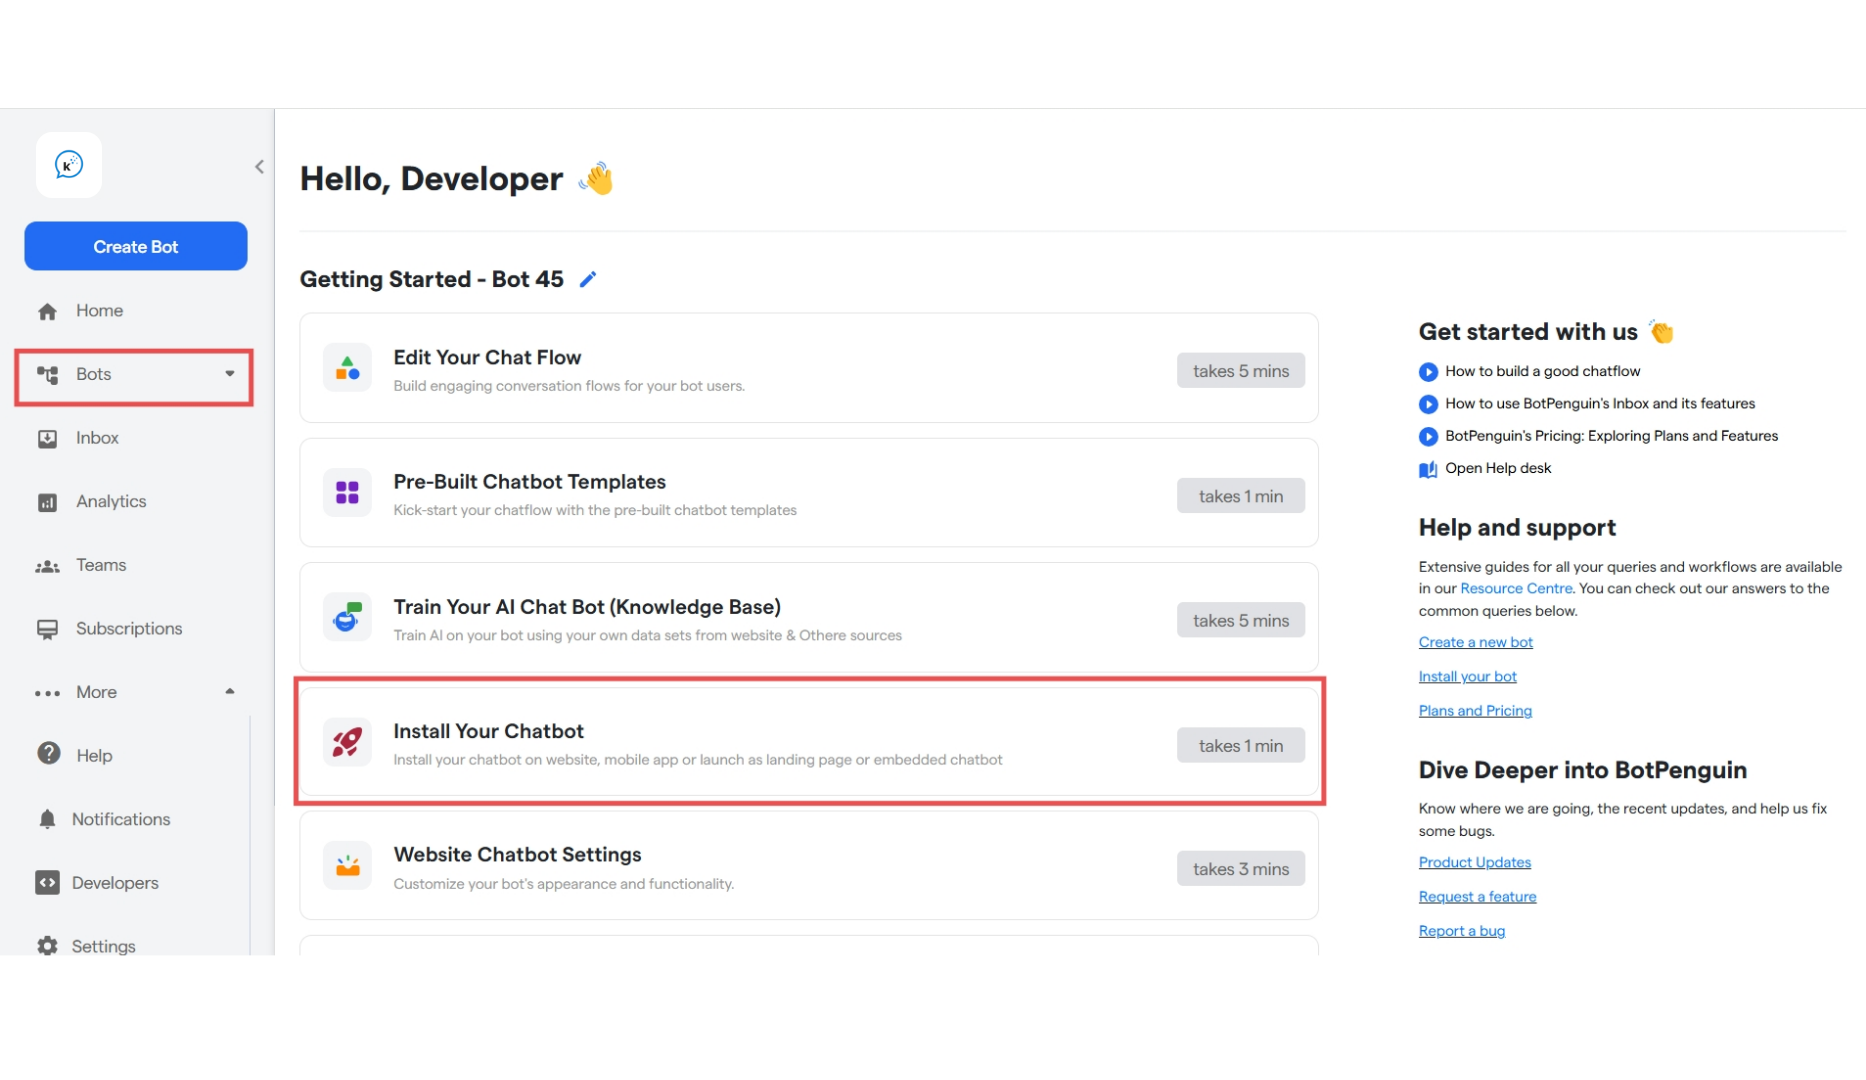
- To manage your bot, select it from the left sidebar under “Bots”
-
Now click on “Install Your Chatbot.”
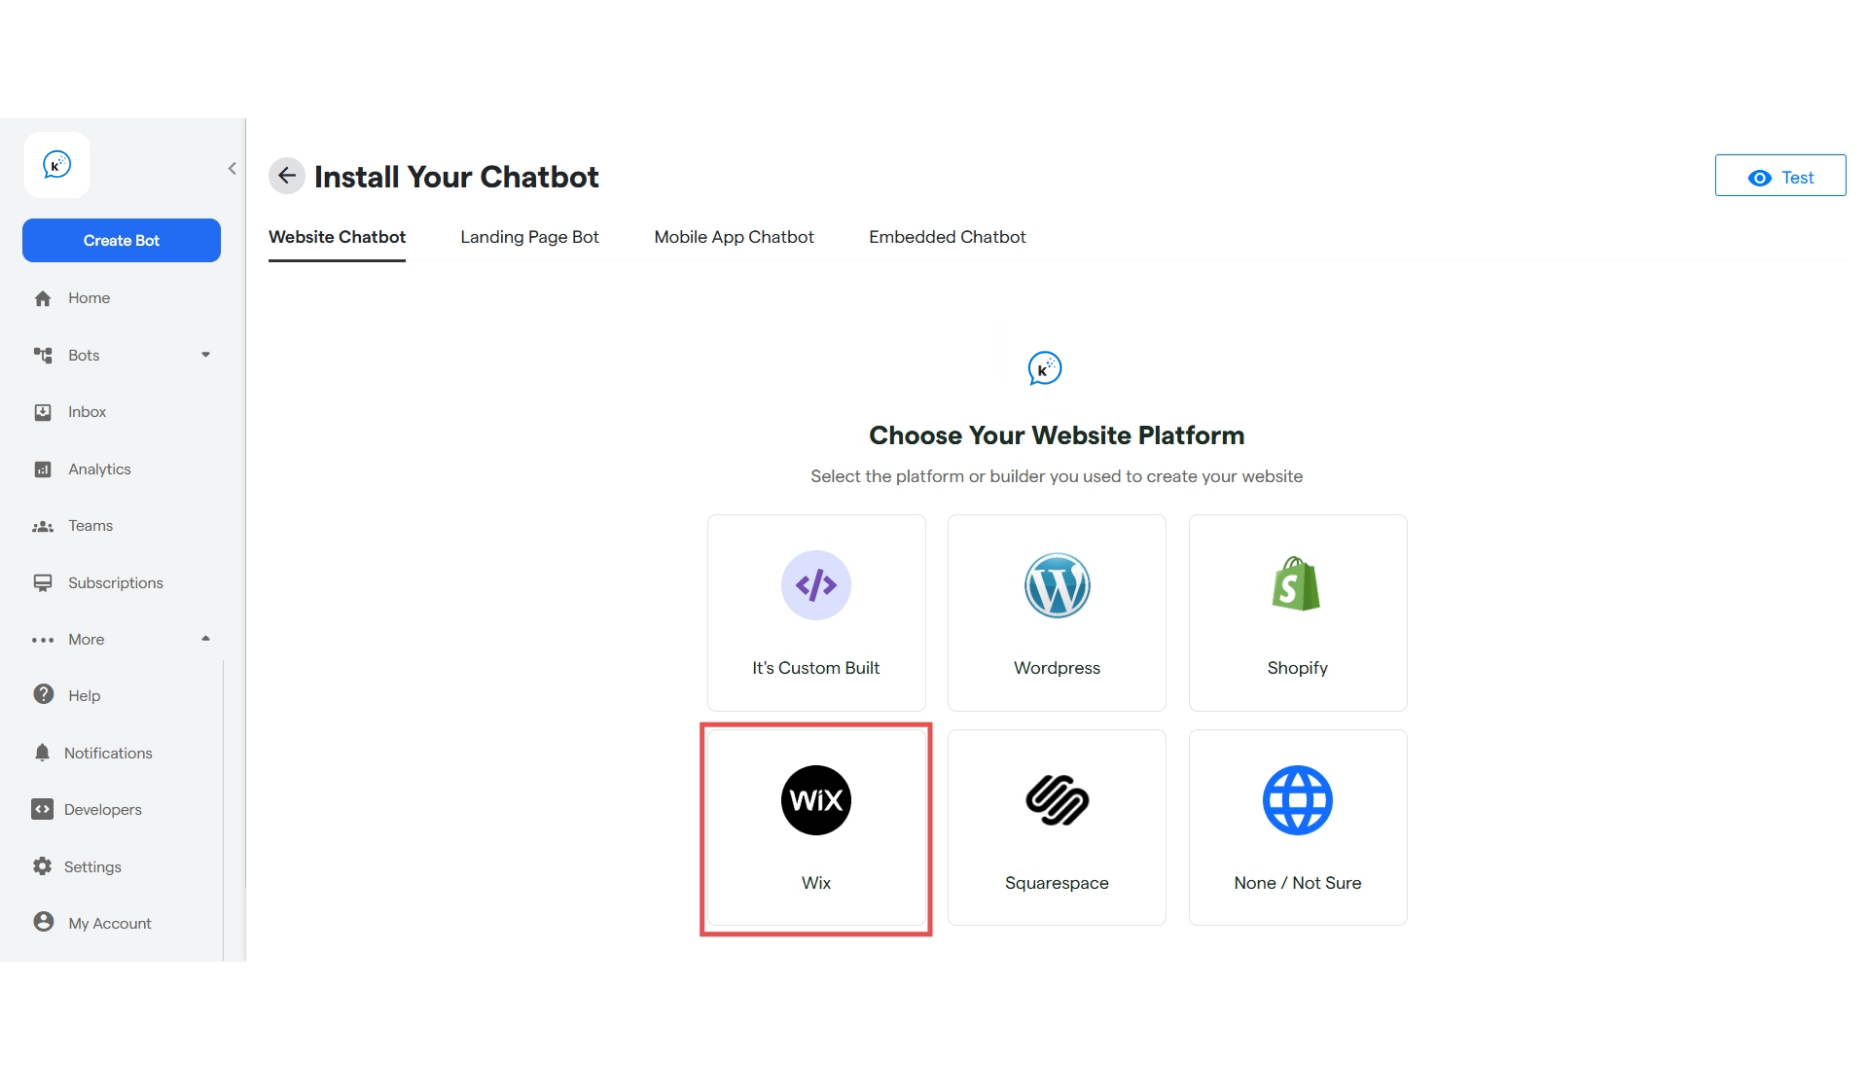
- You can select the platform where you need to deploy your chatbot.
-
Click on “Wix” to install your chatbot on your Wix website.
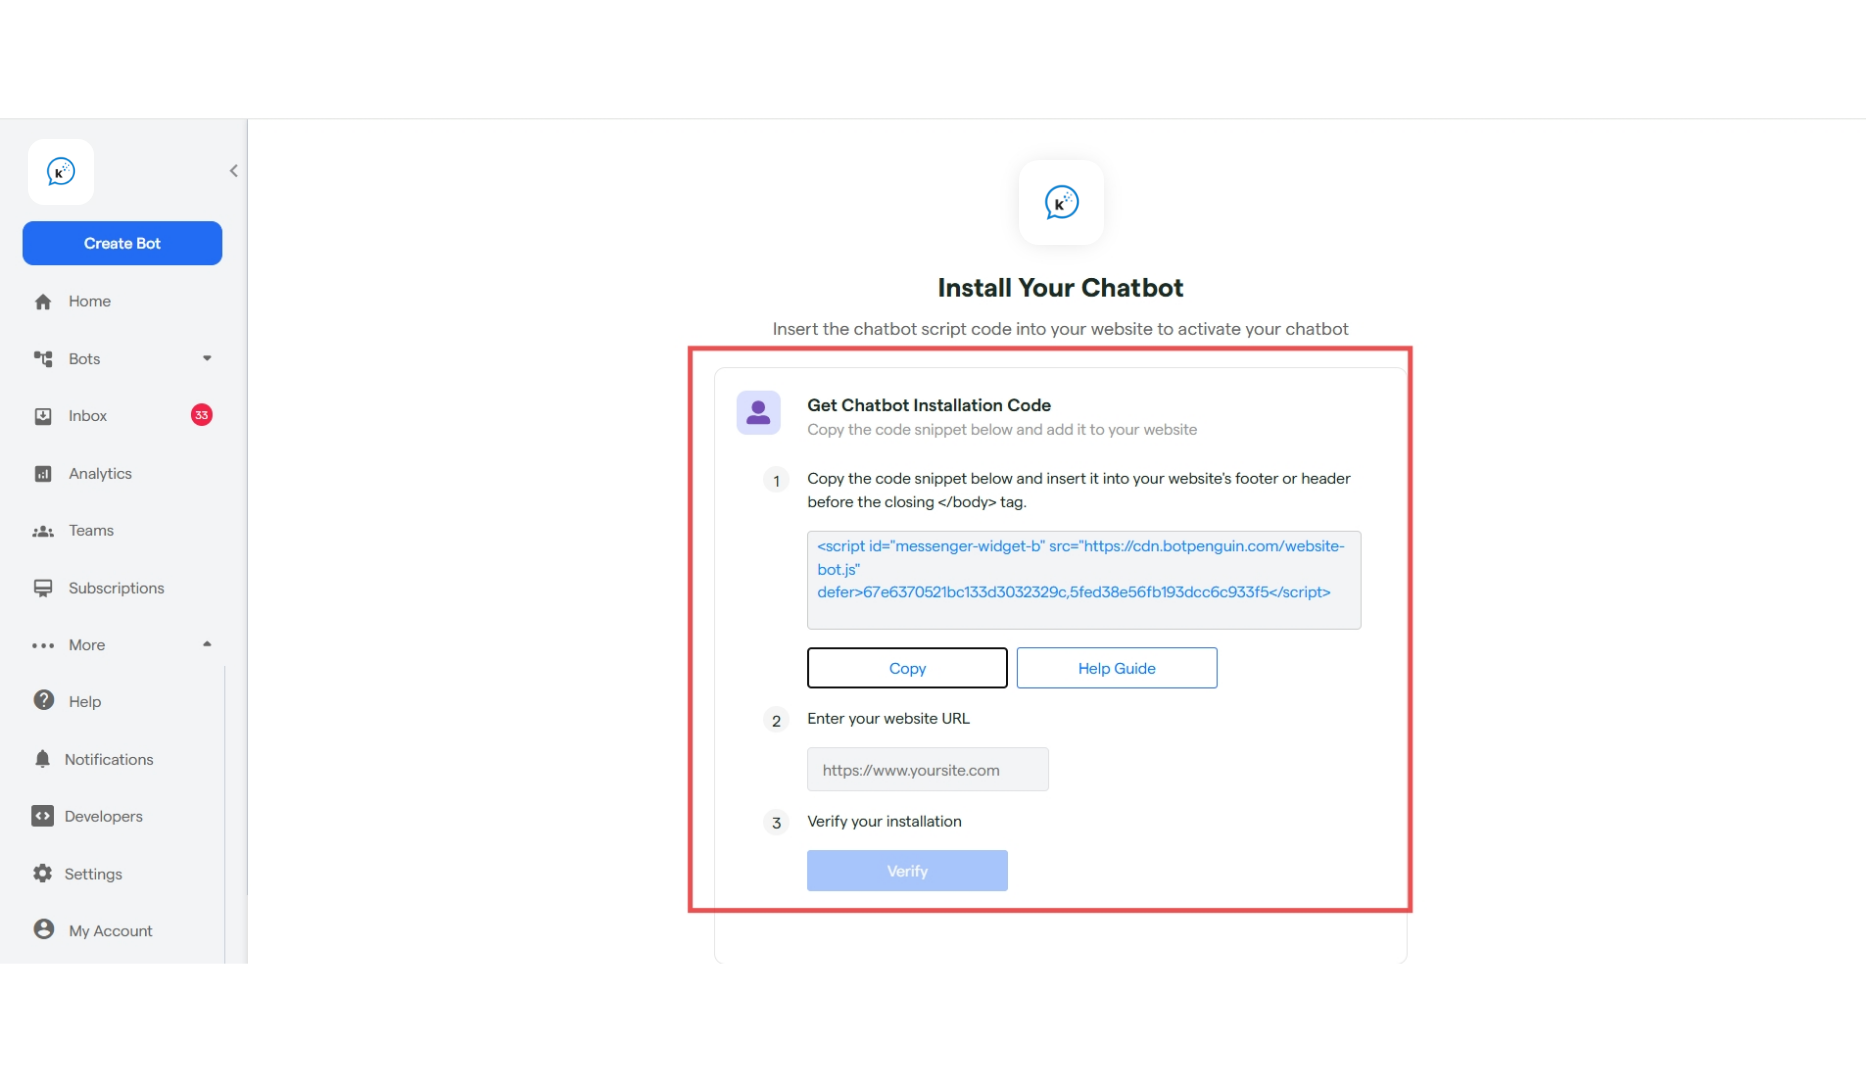
 Kindly be sure to test your chatbot before installation. This can be accomplished using the “Test” button on the top right corner of the installation screen.
 - A variety of options are available for installation methodology. They are:
- Get Chatbot Installation code: From this section, you can directly copy the script code for your chatbot.
- Share Installation code: Installation code will be sent directly to your development team via email.
-
Ask Convertalk Support: Our team will assist you in installing your chatbot.
-
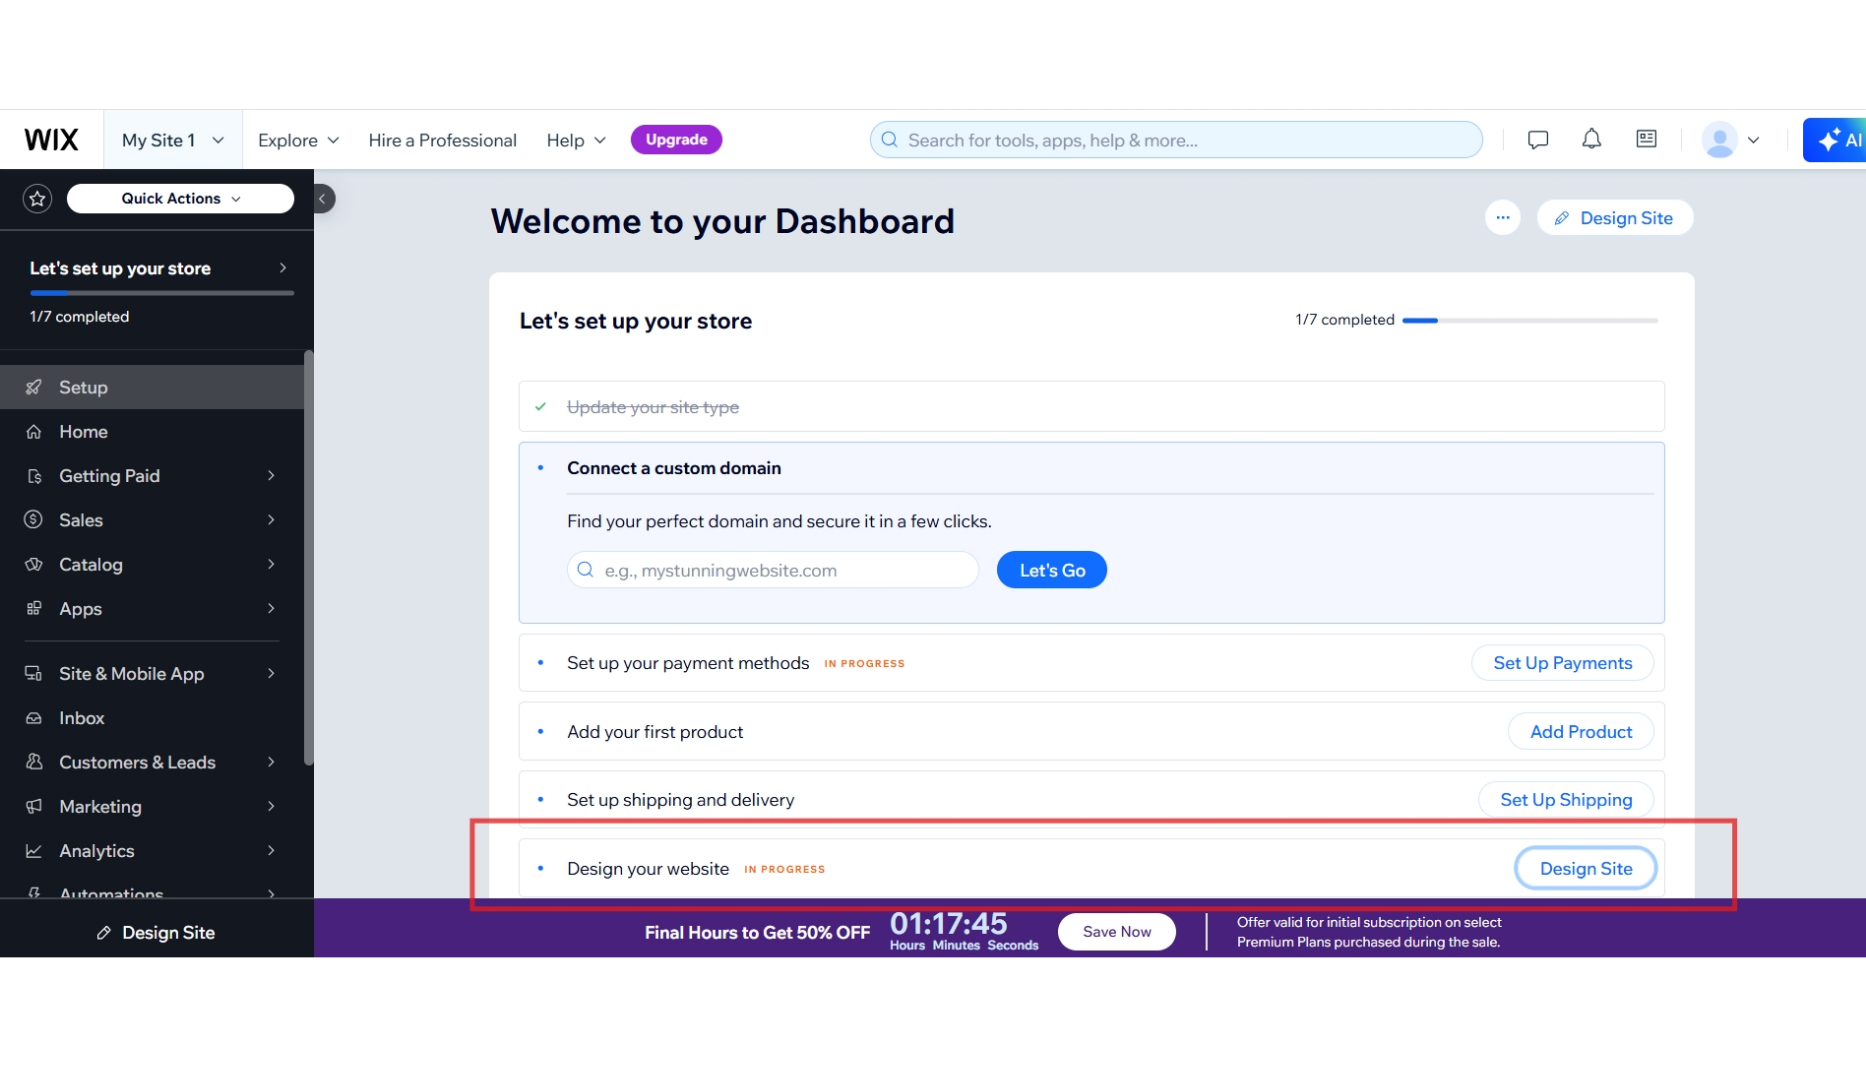
Sign-up for a Wix account, and fill the required details until you reach the dashboard as shown below.
If you already have a website on Wix, kindly proceed to the editor section of the website.
-
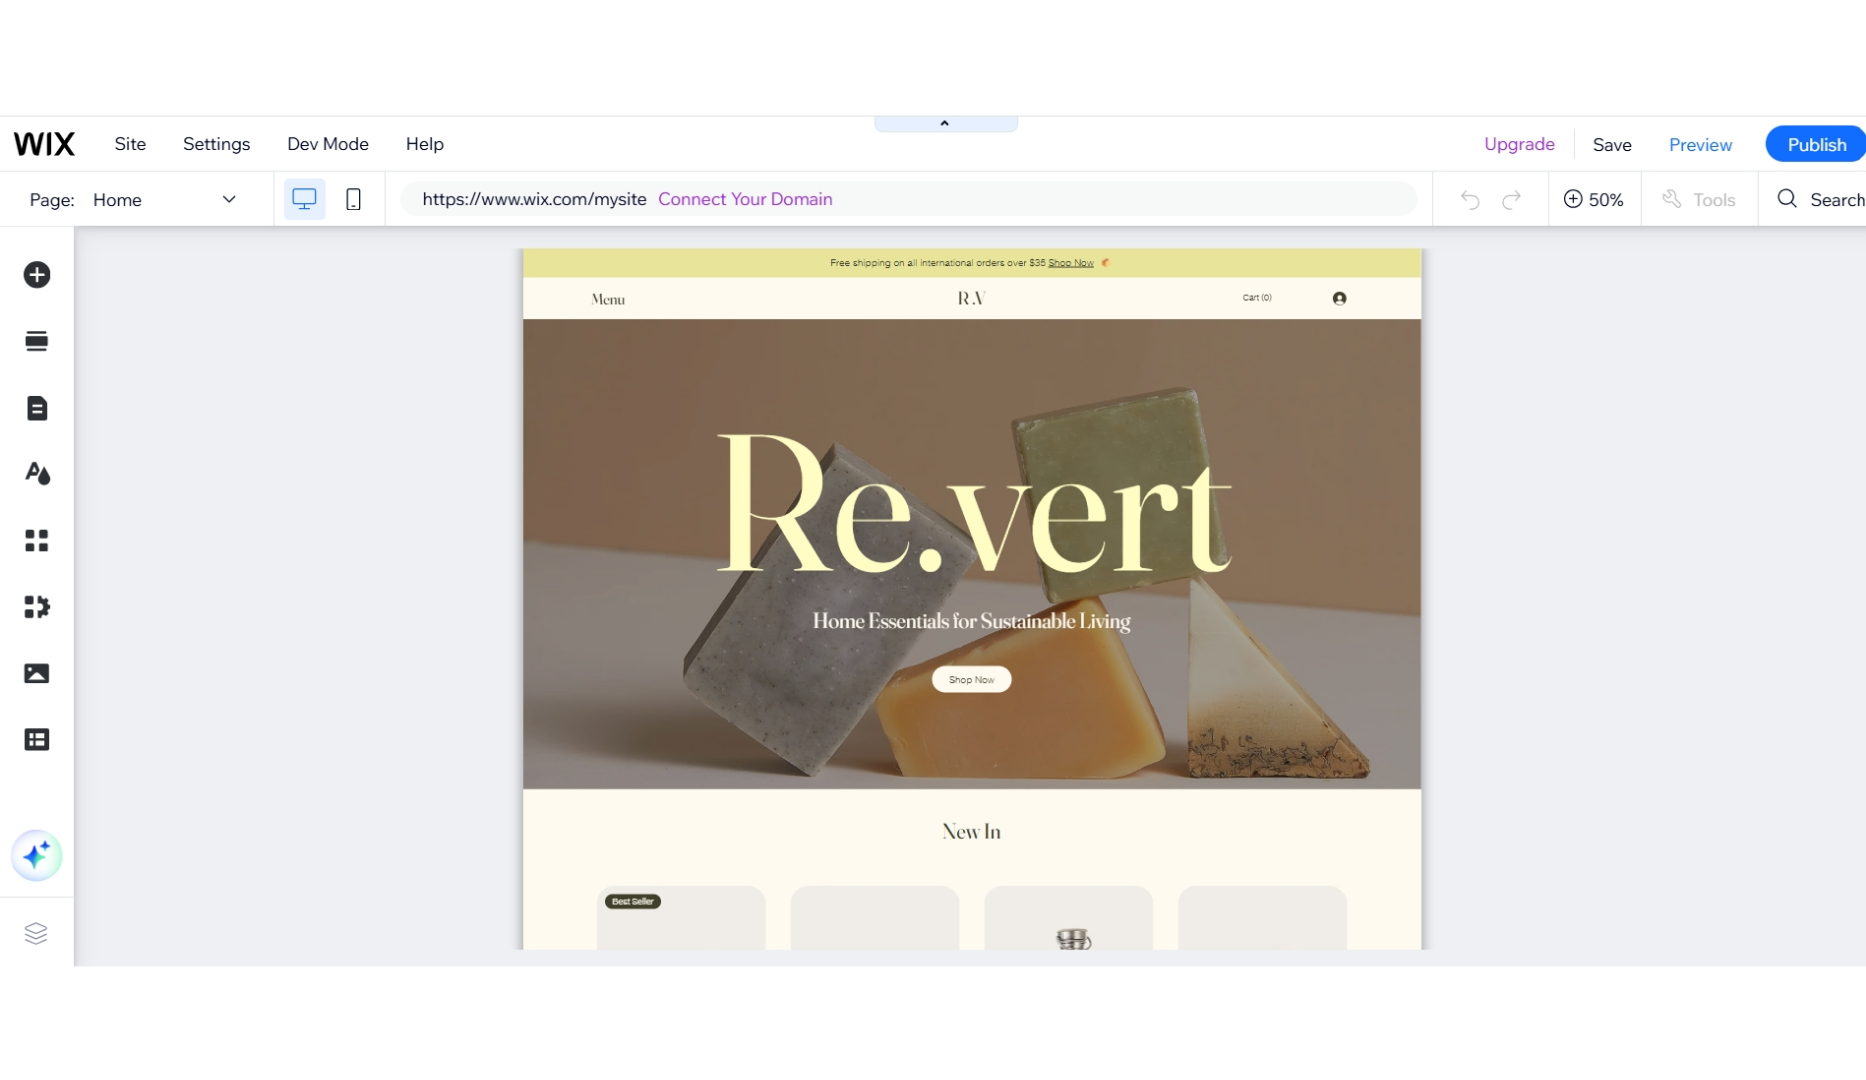
Click on “Design your website” to go to the editor. Create your website using the directions specified by Wix, or choose a prebuilt template. We will be using a prebuilt template in this guide.
Section B: Deleting “Wix Chat” Widget:
- Firstly, we have to make sure that the recently added “Wix Chat” is no ton the page. If you see a chat widget on the bottom right of the page, then we have to delete the same so that it is not shown as a double bot.
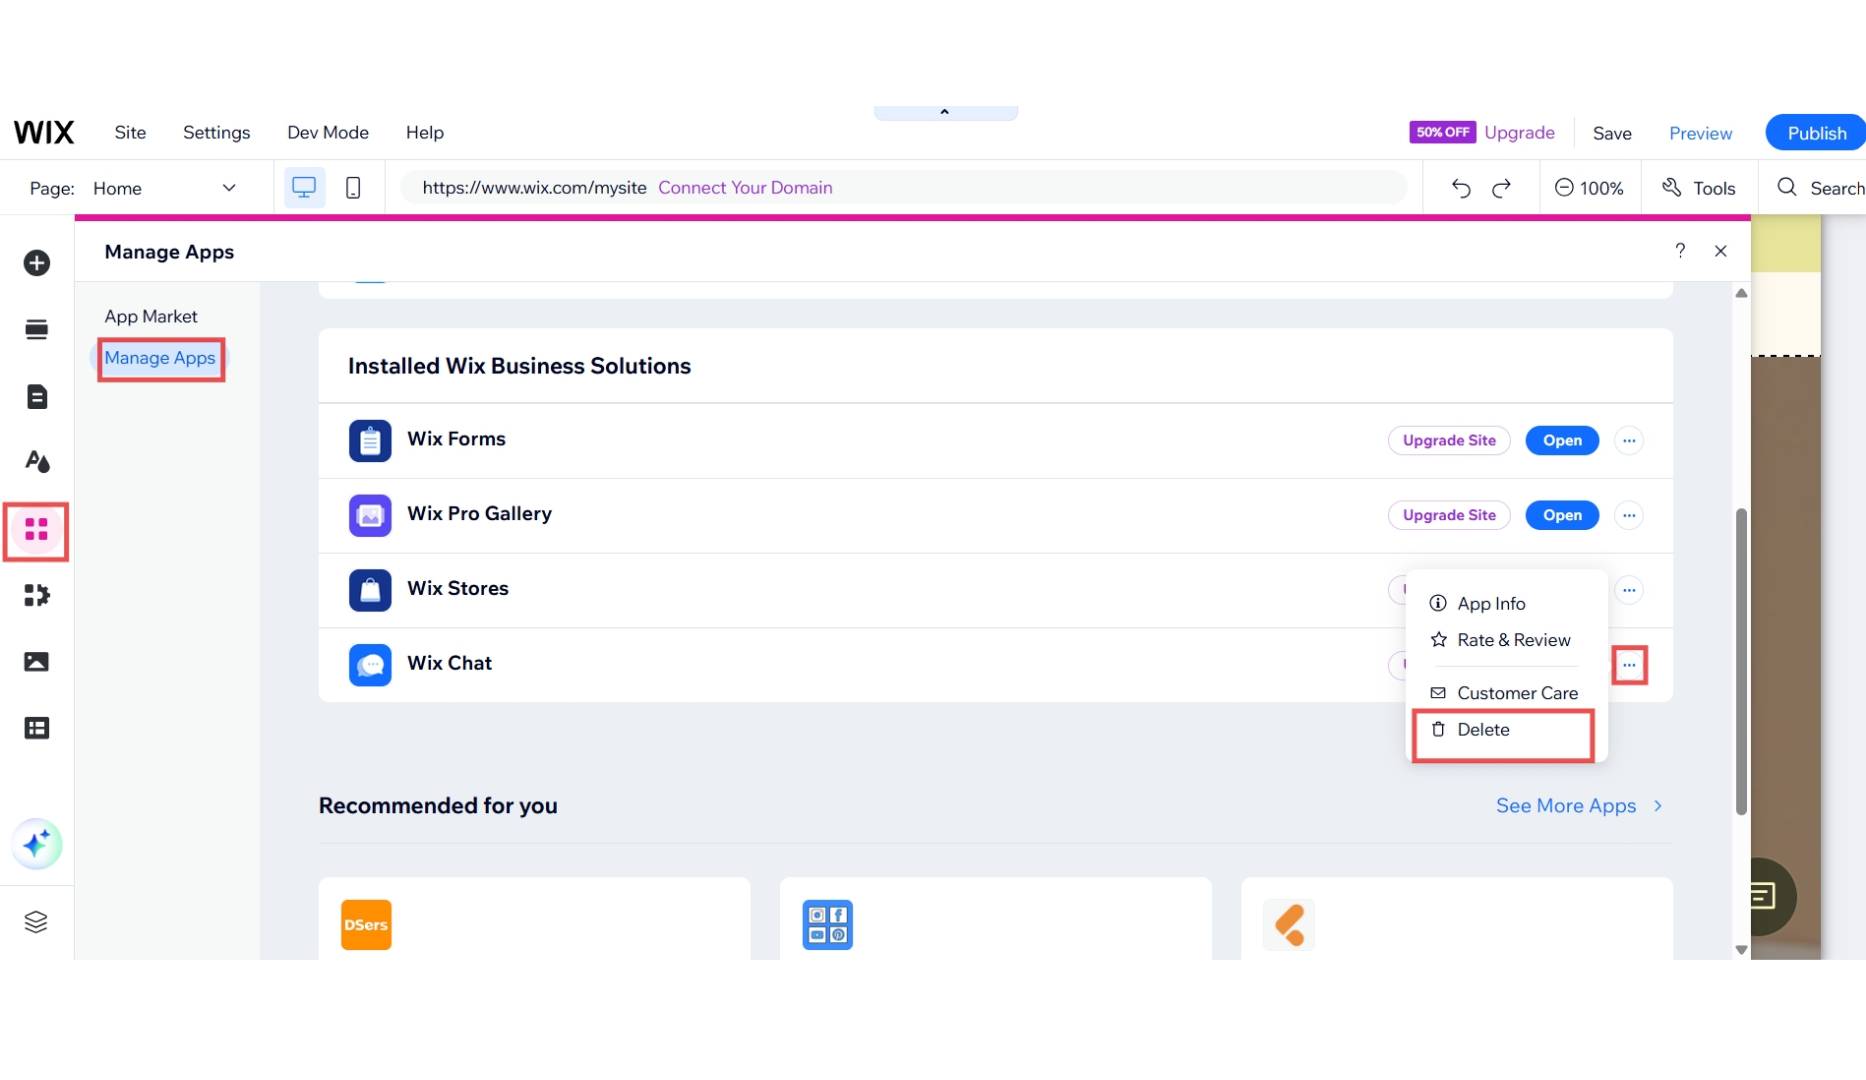
- To delete the Wix Chat widget, go to the “Add Apps” section on the left sidebar, then click on “Manage Apps”.
-
Scroll down to the “Wix Chat” app, click the three dots and then click on delete.
Method 1 of Adding Convertalk(for users who have Core Plan or higher of Wix):
-
On the top right, use the Search functionality to look up “Custom Code”.
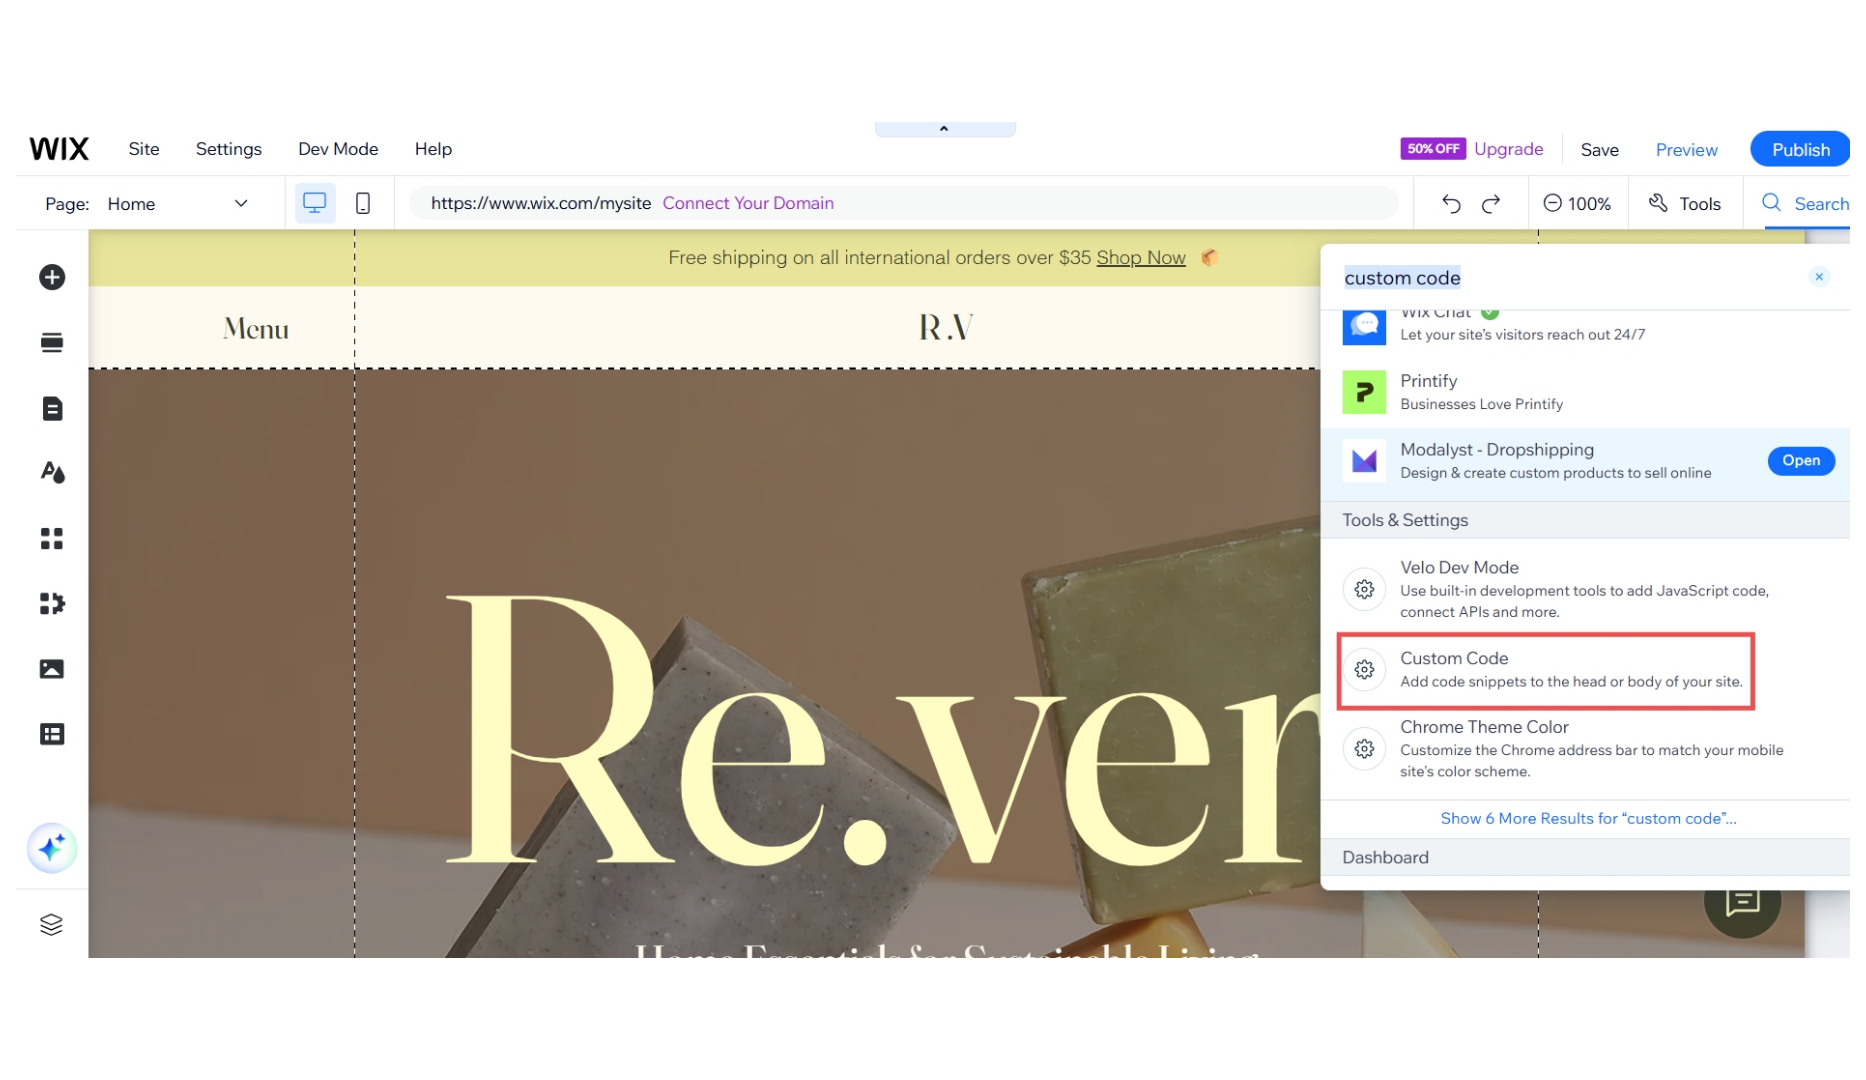
-
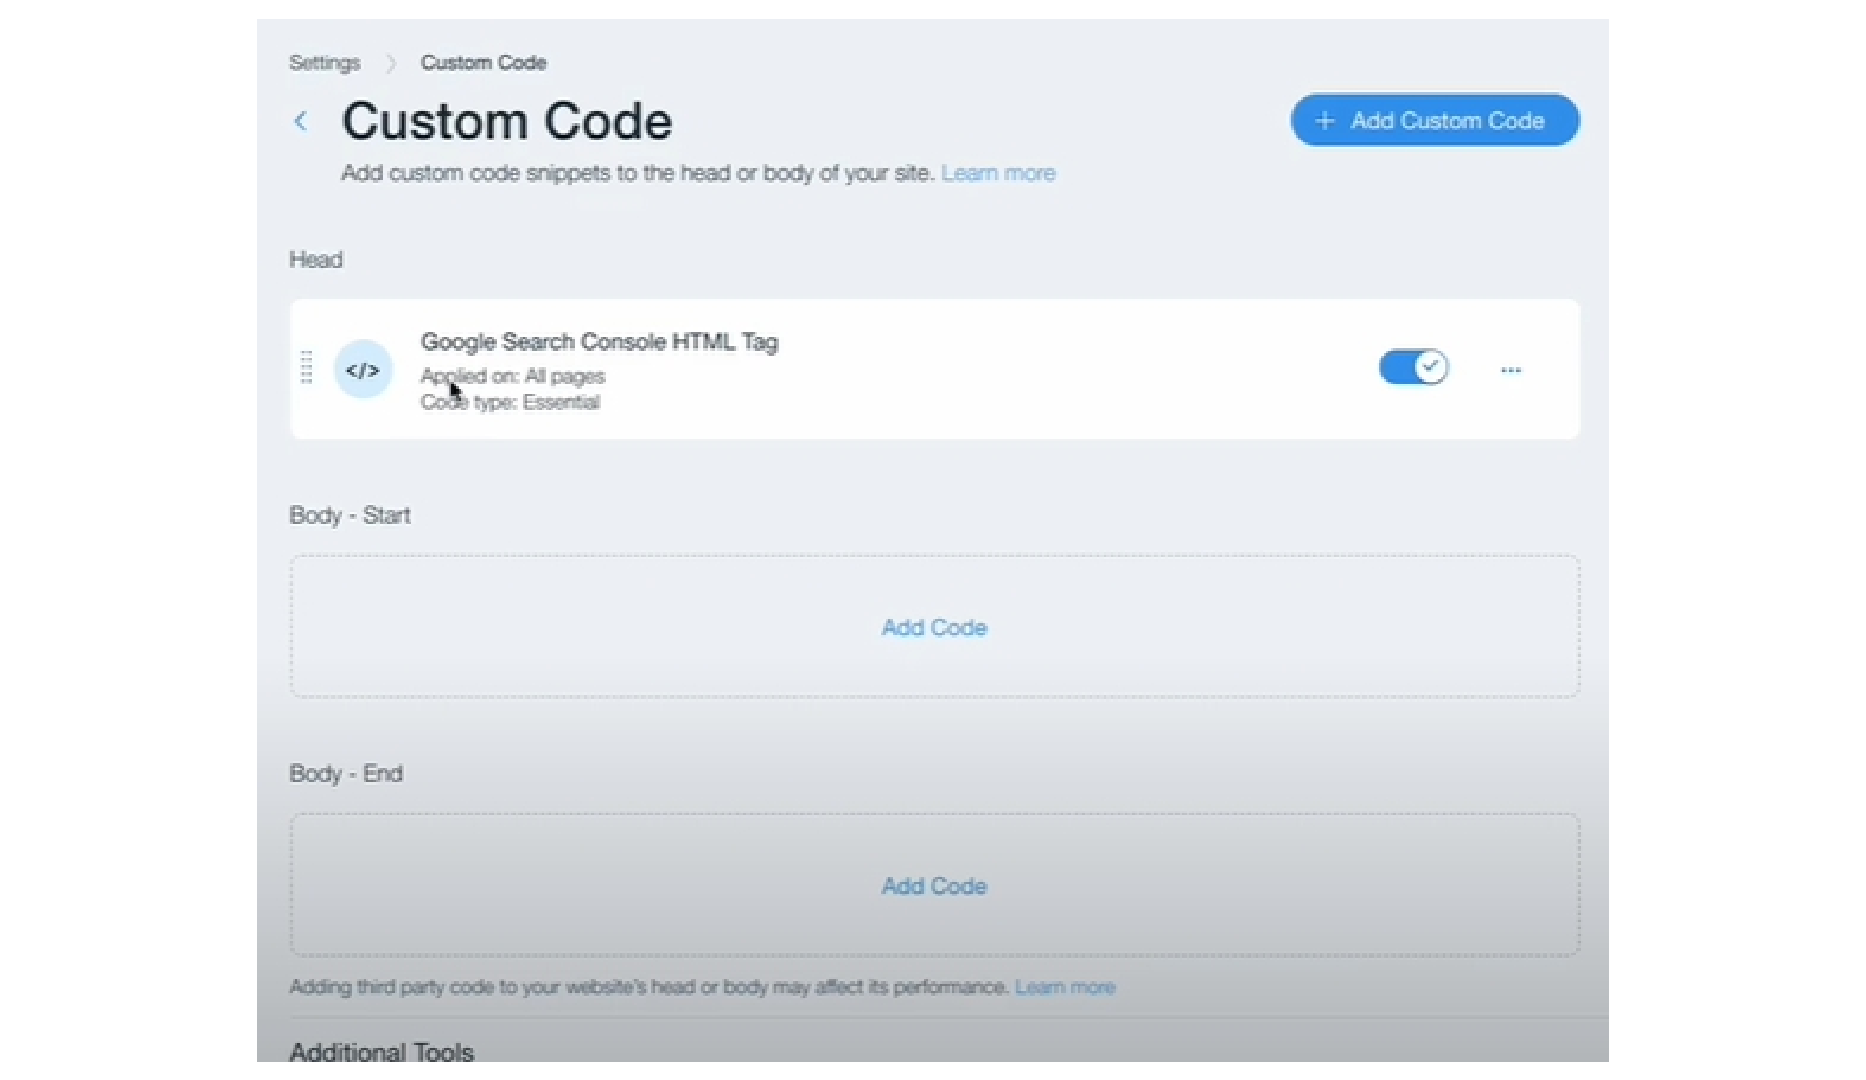
Click on the “Add Custom Code” option, and add your custom code.
-
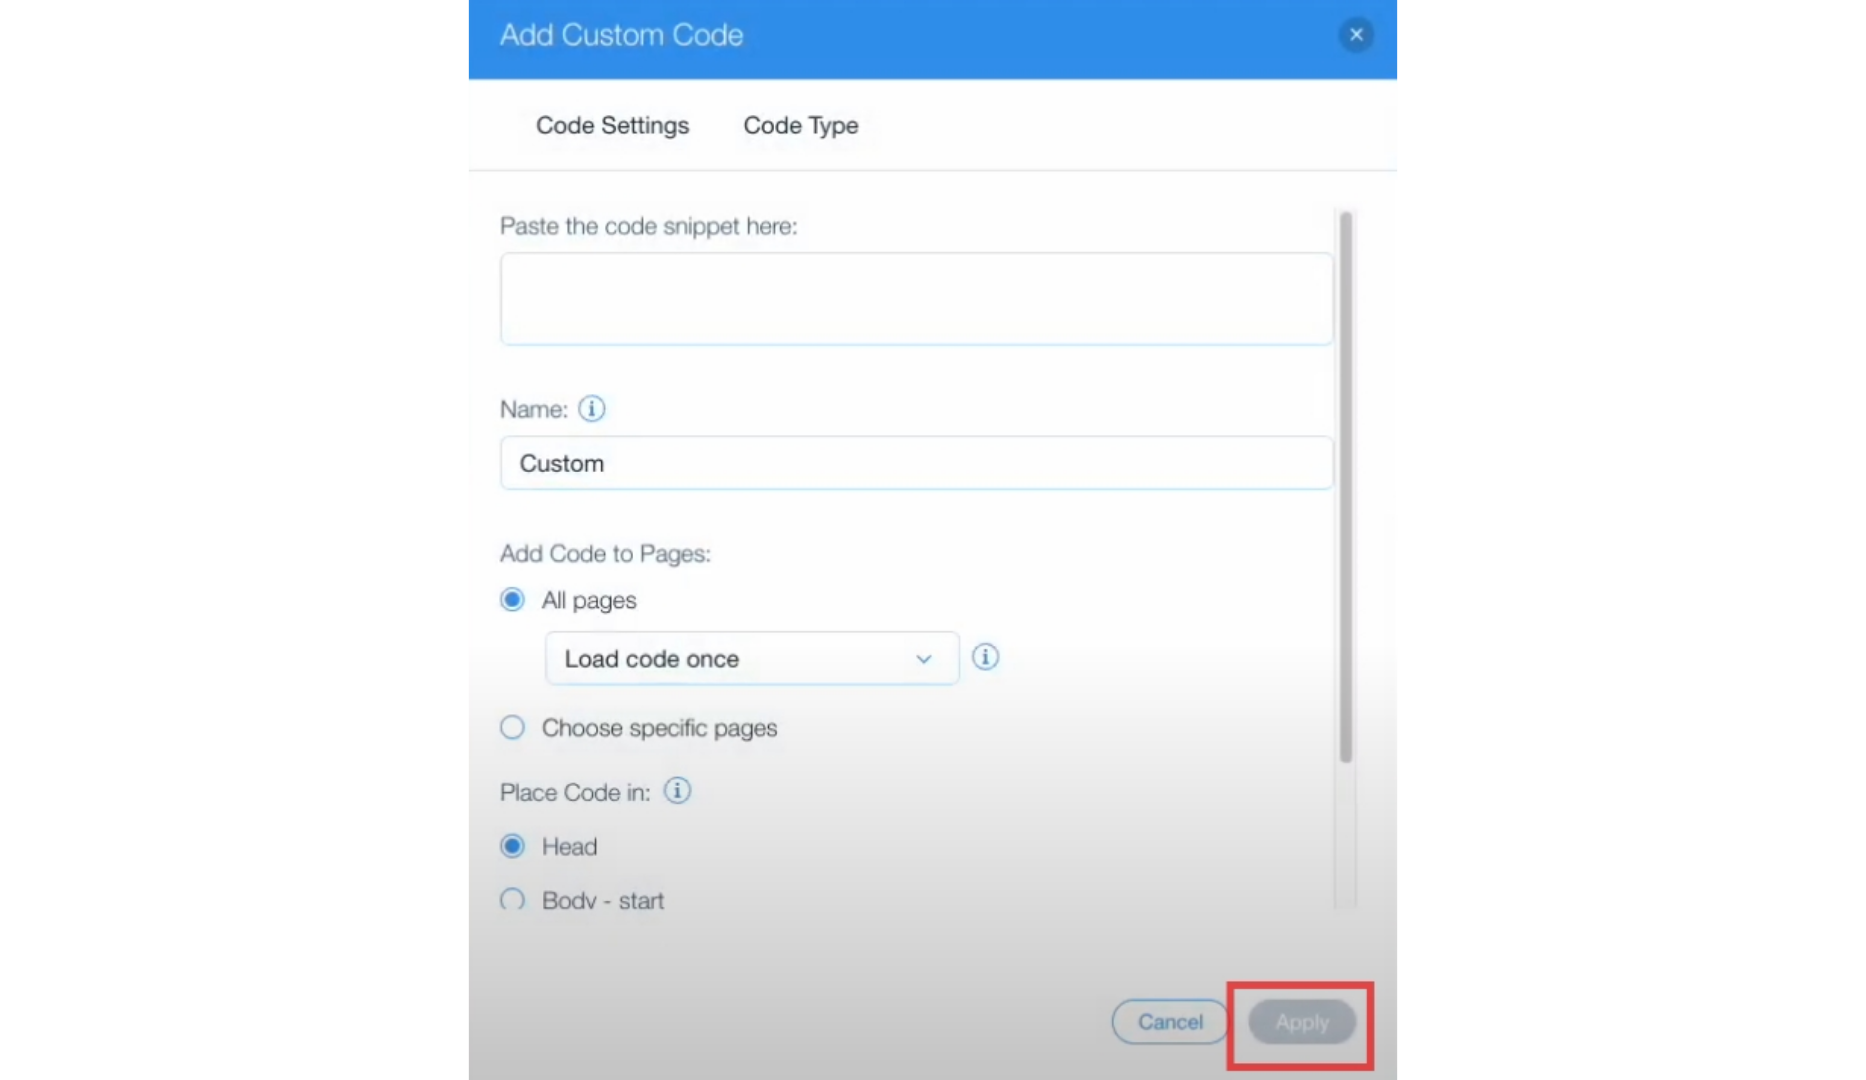
Enter the script from Convertalk in the “Paste the code snippet here” section.
Choose Body-Start or Body-end in “Place code in”. Also, remember to click apply.
Method 2 of Adding Convertalk(for users with Light or free usage of Wix):
-
Hover on the “Plus” icon on the left sidebar. Proceed to “Embed code” and then click on “Embed HTML”.
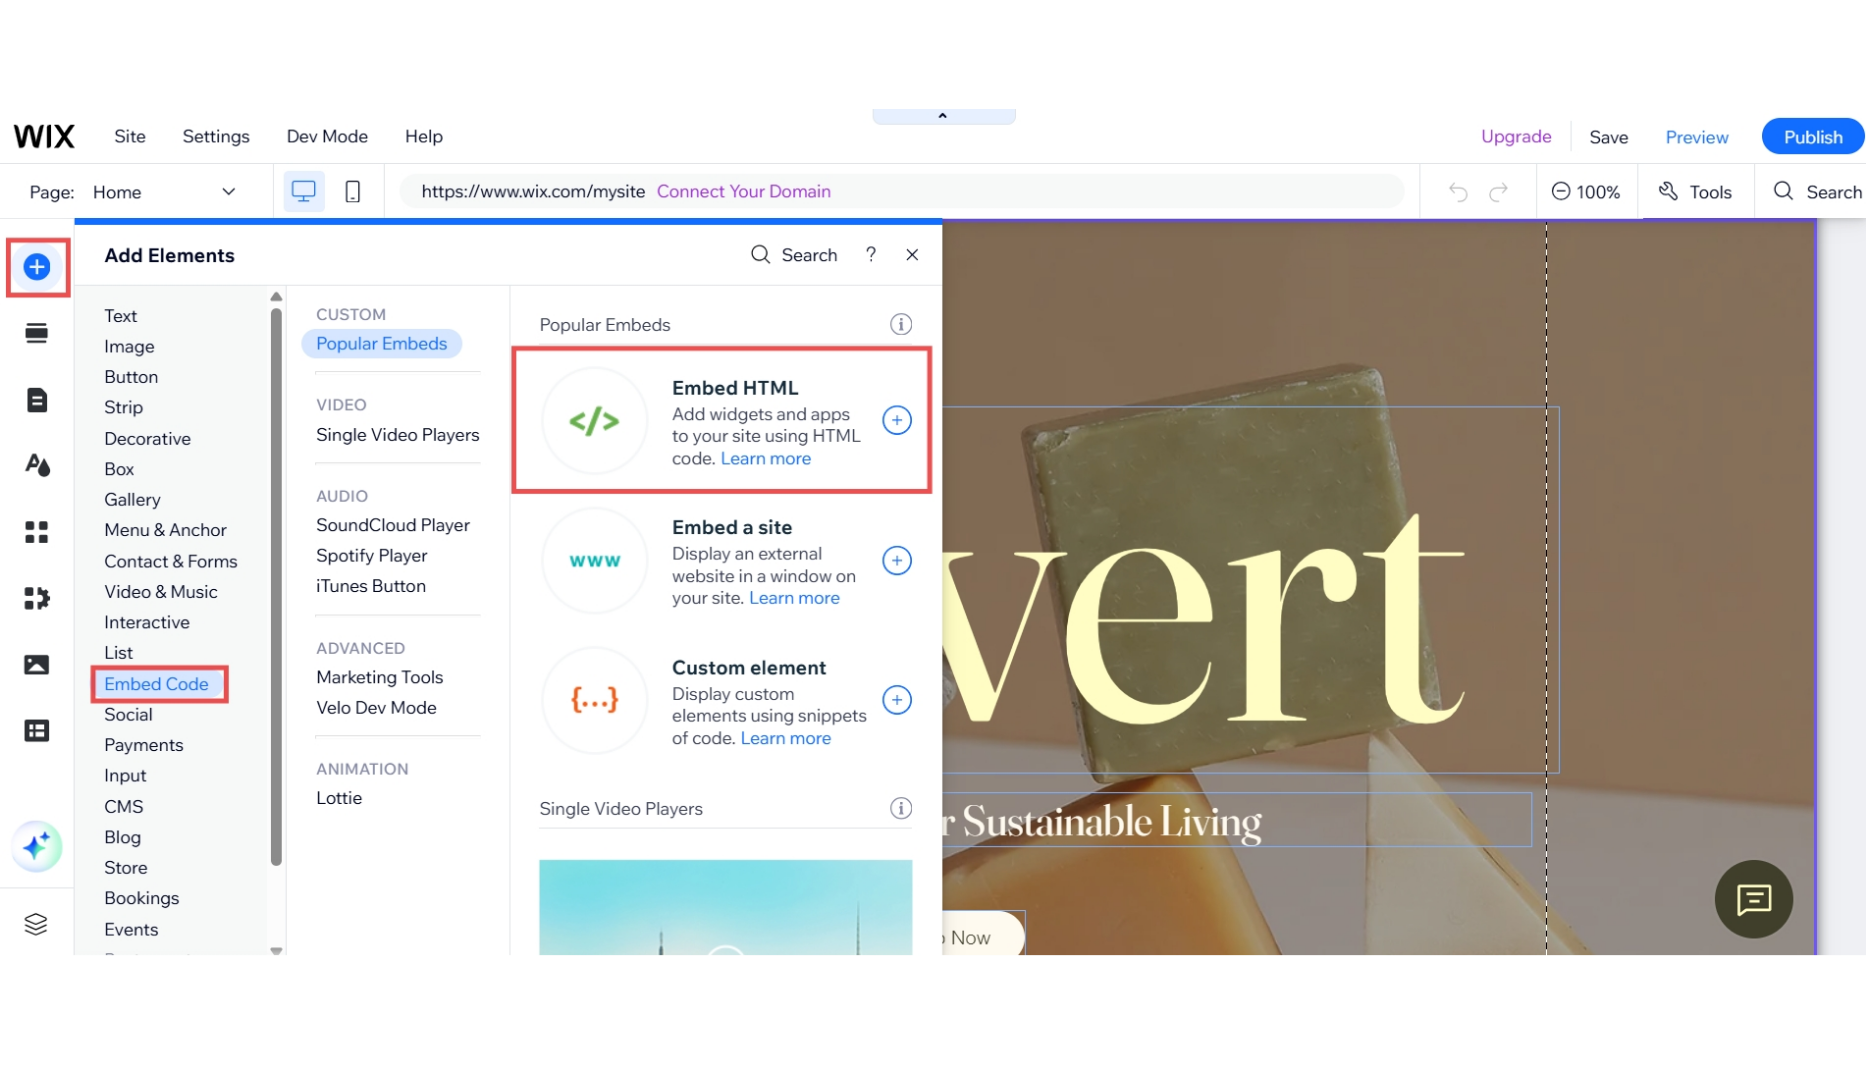
-
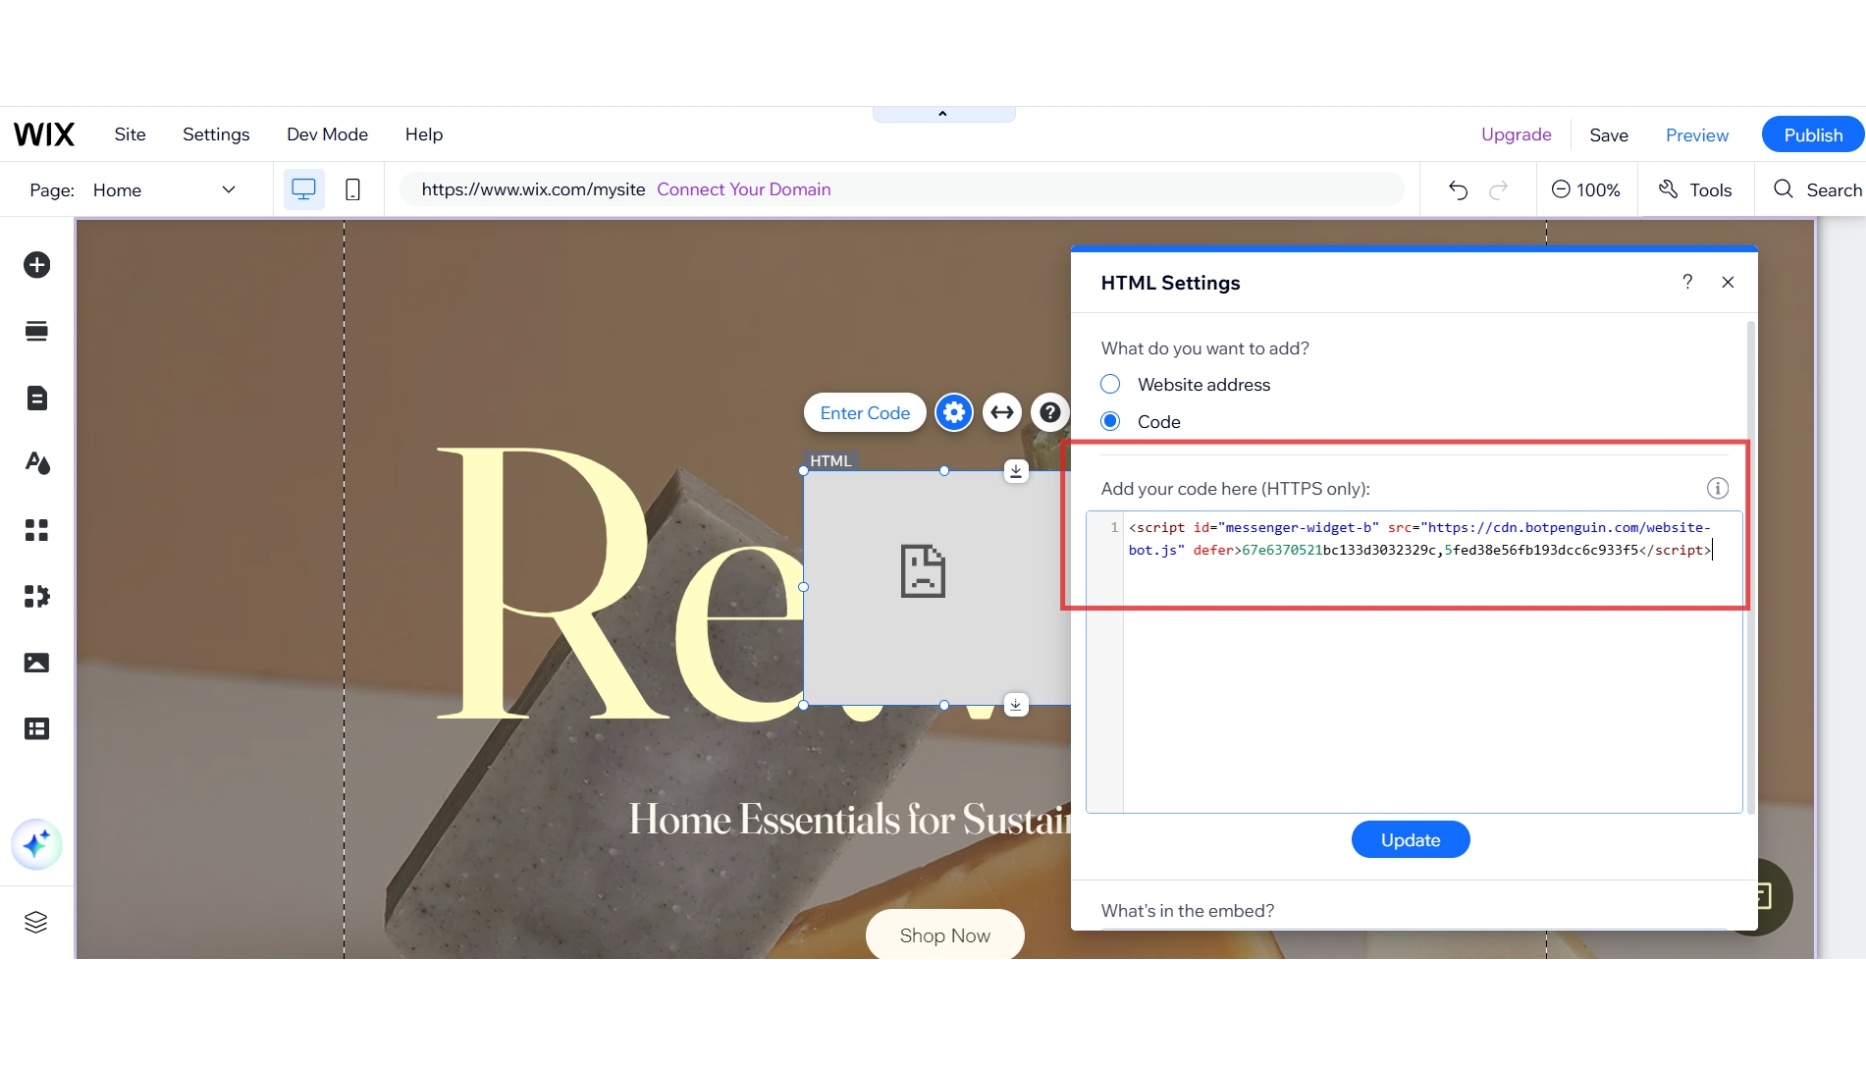
A window will appear prompting you to enter the code. Copy and paste the code from Convertalk installation screen, and enter it in the allotted space.
Add your domain on the Convertalk Installation screen as well. If creating a website for the first time, put the domain name after it has been finalized.
-
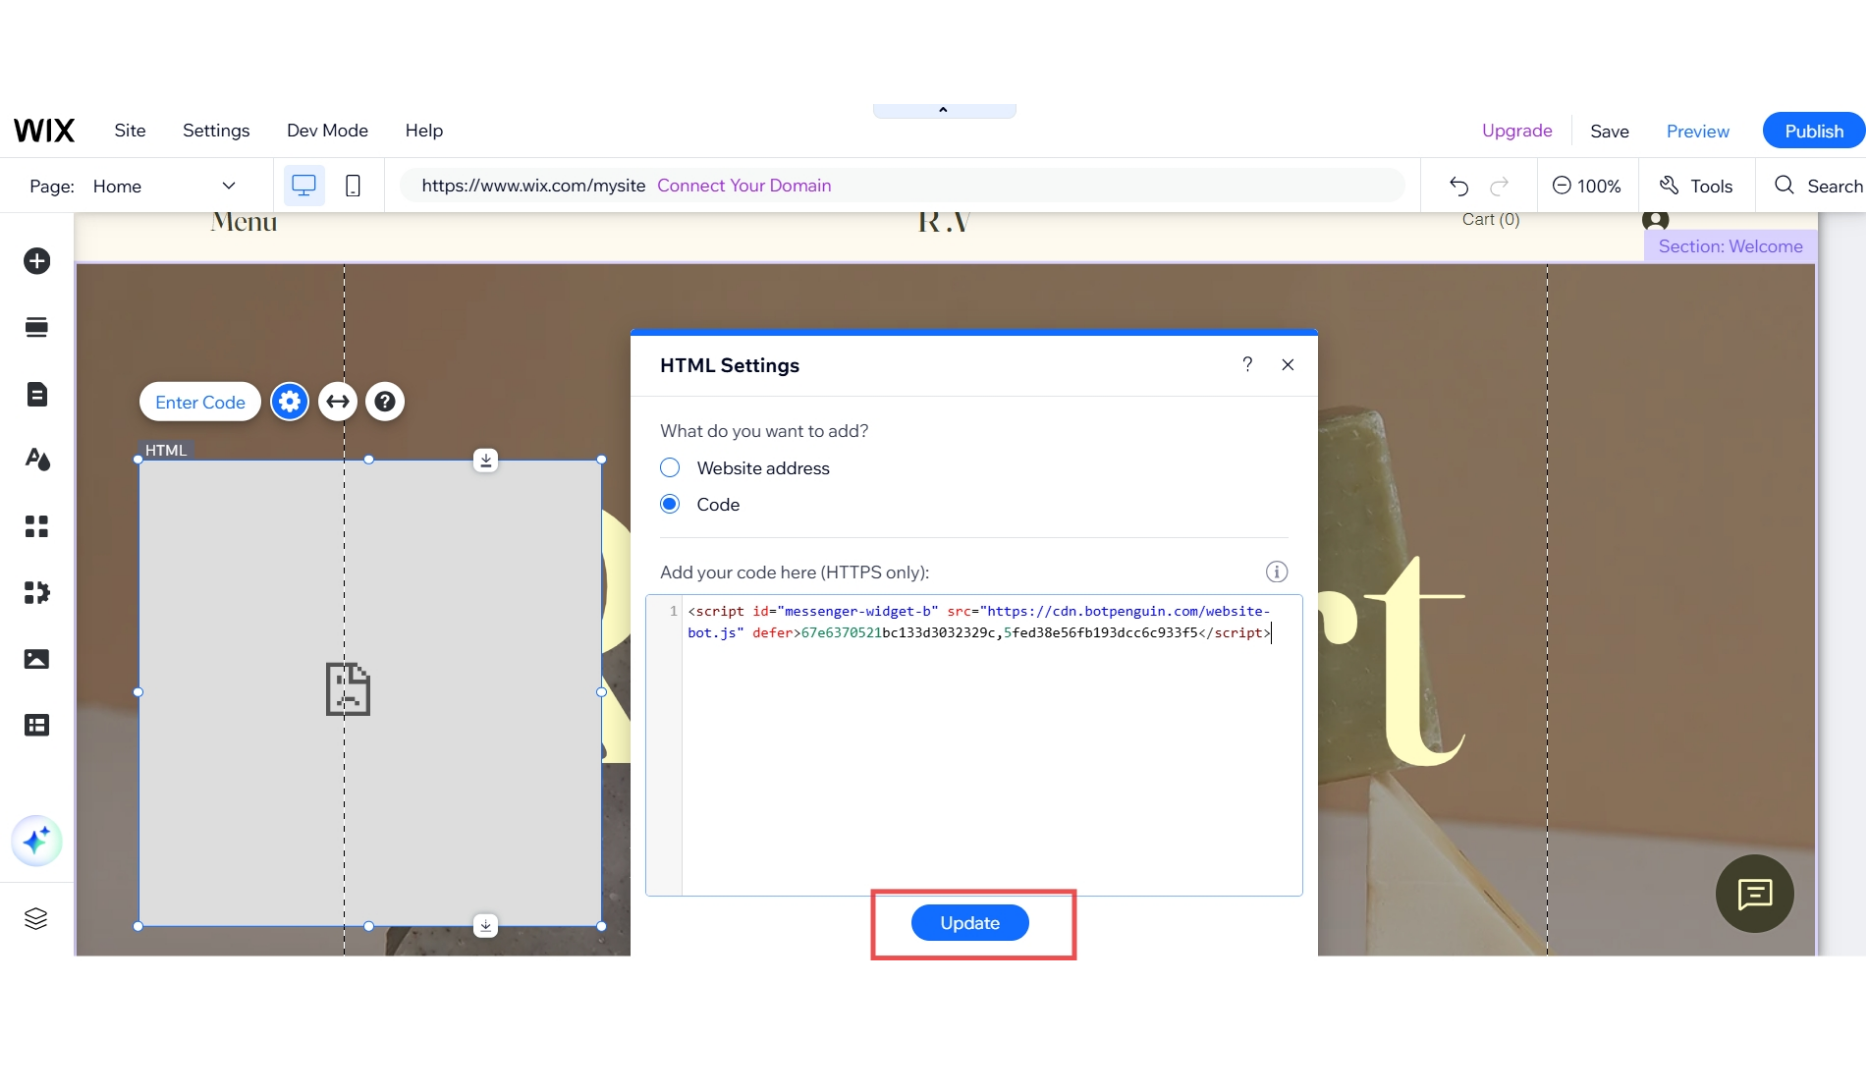
Adjust the size and placement of the chatbot screen as per your preference. By default, the screen is too small for the bot, so be sure to resize it. Once done, click the Update button to apply the changes.
Having Trouble? Let’s Troubleshoot!
If your Convertalk chatbot isn’t appearing or functioning properly on your Wix website, try these quick fixes:- Check Code Placement: Ensure the chatbot script is correctly pasted in Wix as per directions above.
- Verify Installation Code: Ensure that the “Update” button was pushed when the bot was being installed on Wix.
- Clear Cache & Refresh: Clear browser cache and refresh your website. Try opening it in Incognito Mode.