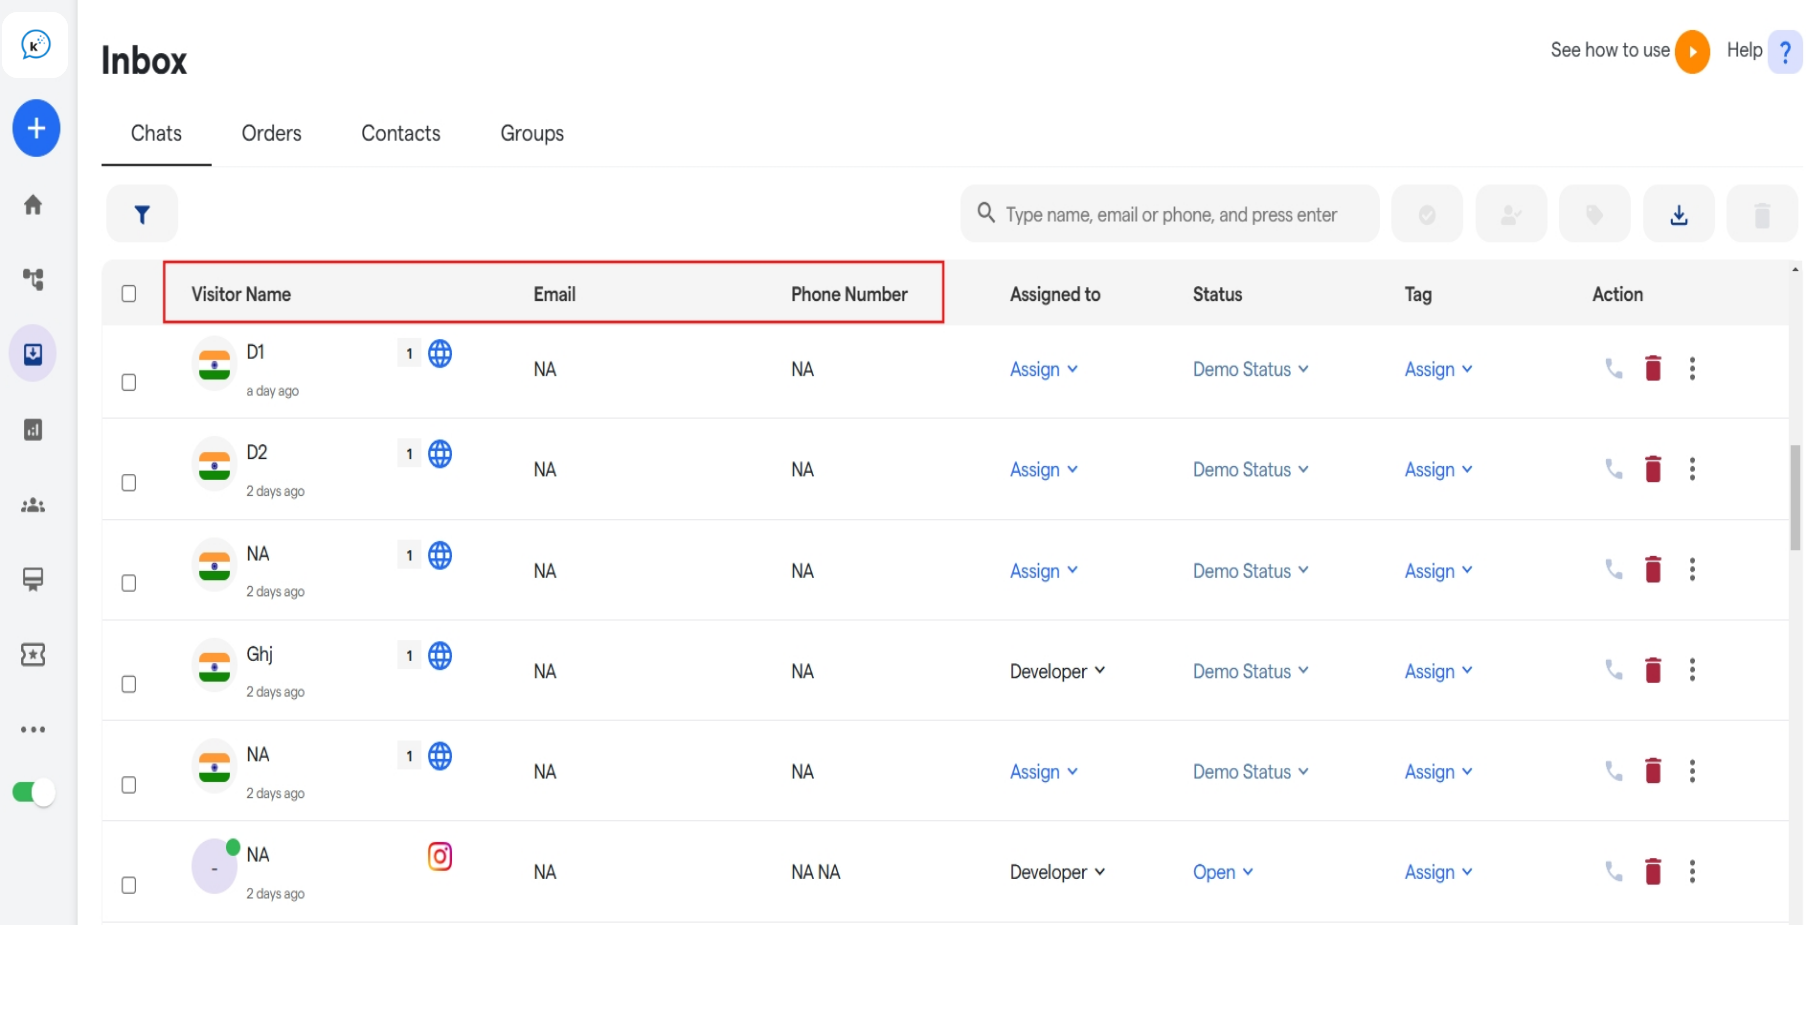
- User Information:
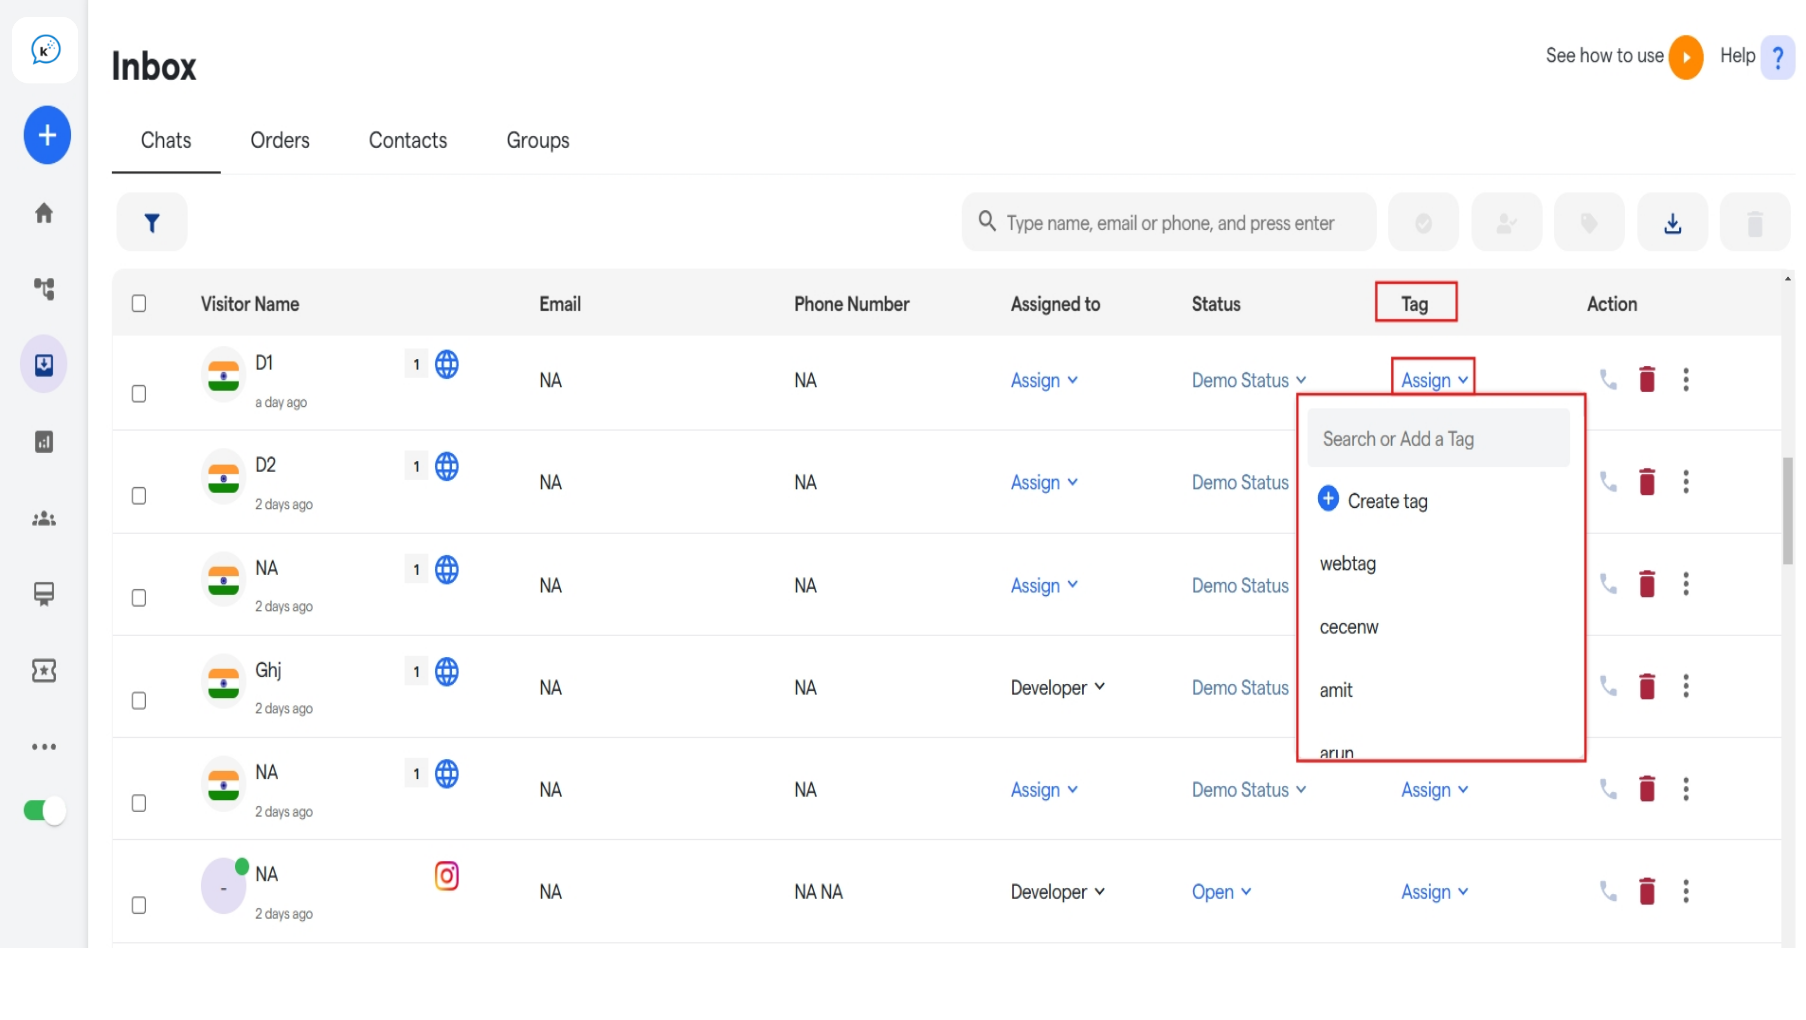
- Tag Assignment :
- You can assign tags to specific chats.
-
To create a new tag, click on the “Create Tag” button available in the dropdown menu.
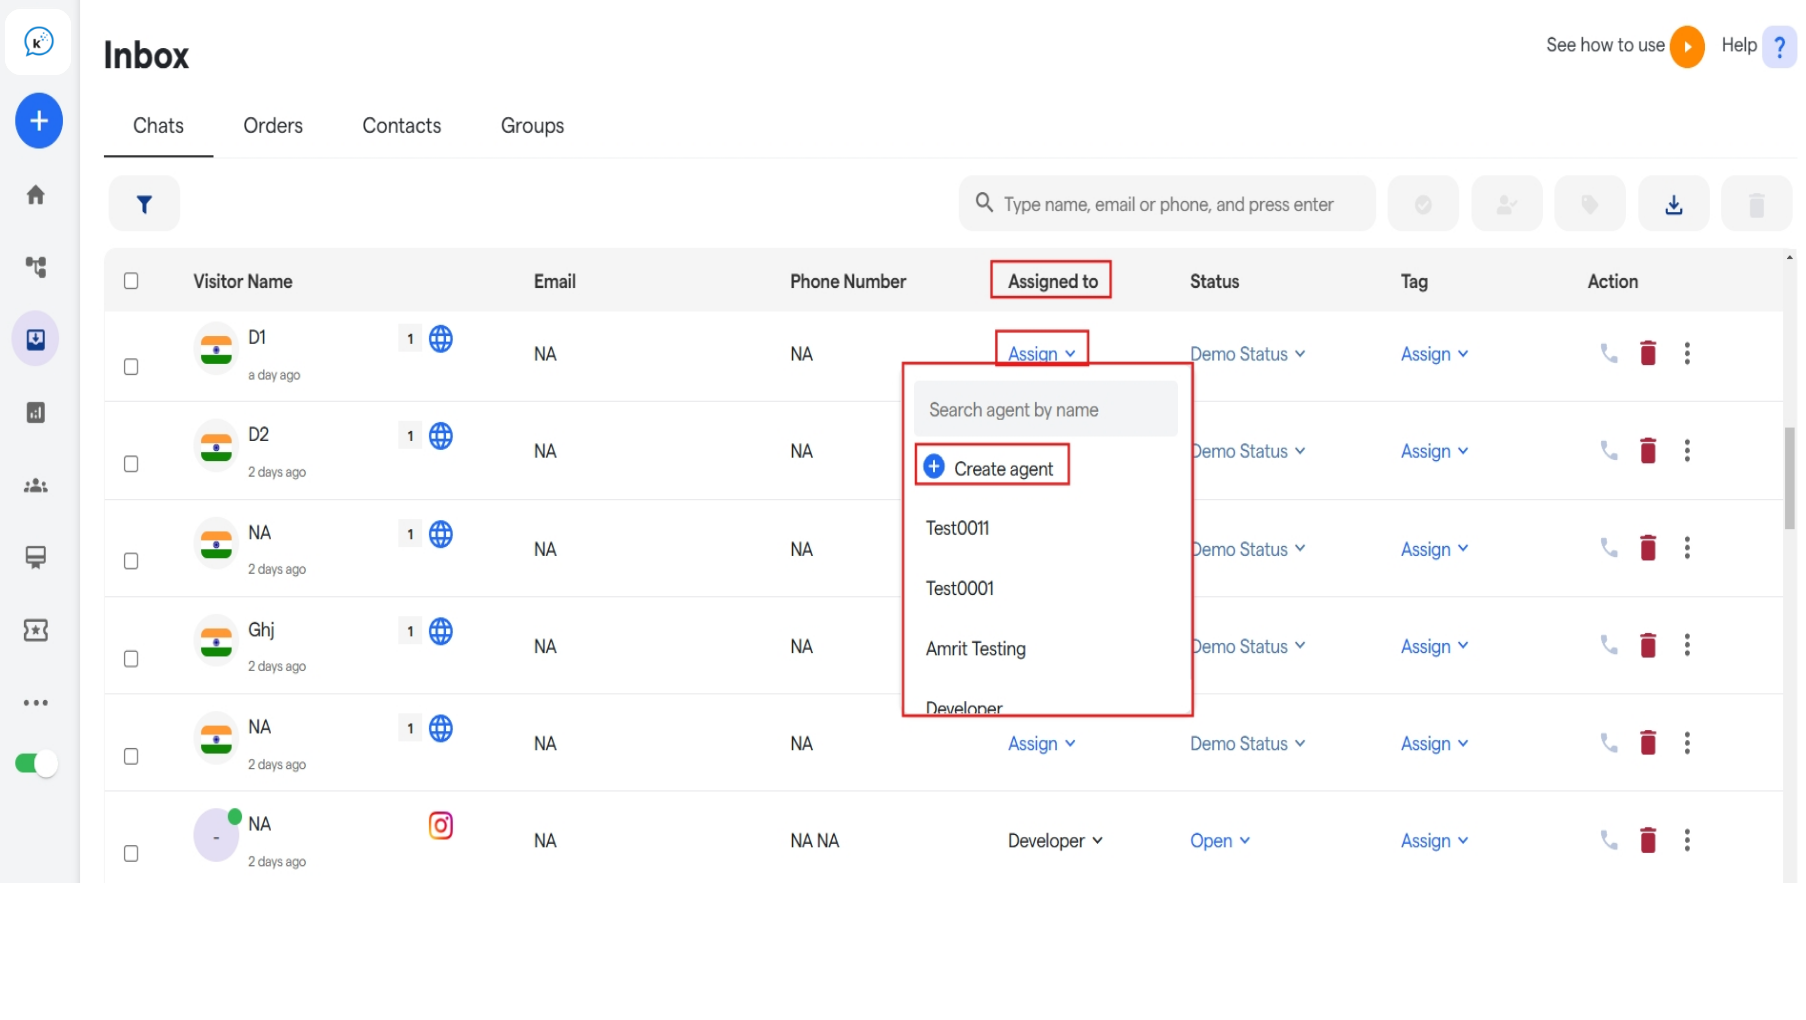
- Assign Live Agent:
- Assign a live agent to handle specific chats.
-
If you need to add a new agent, use the “Create Agent” button in the dropdown menu.
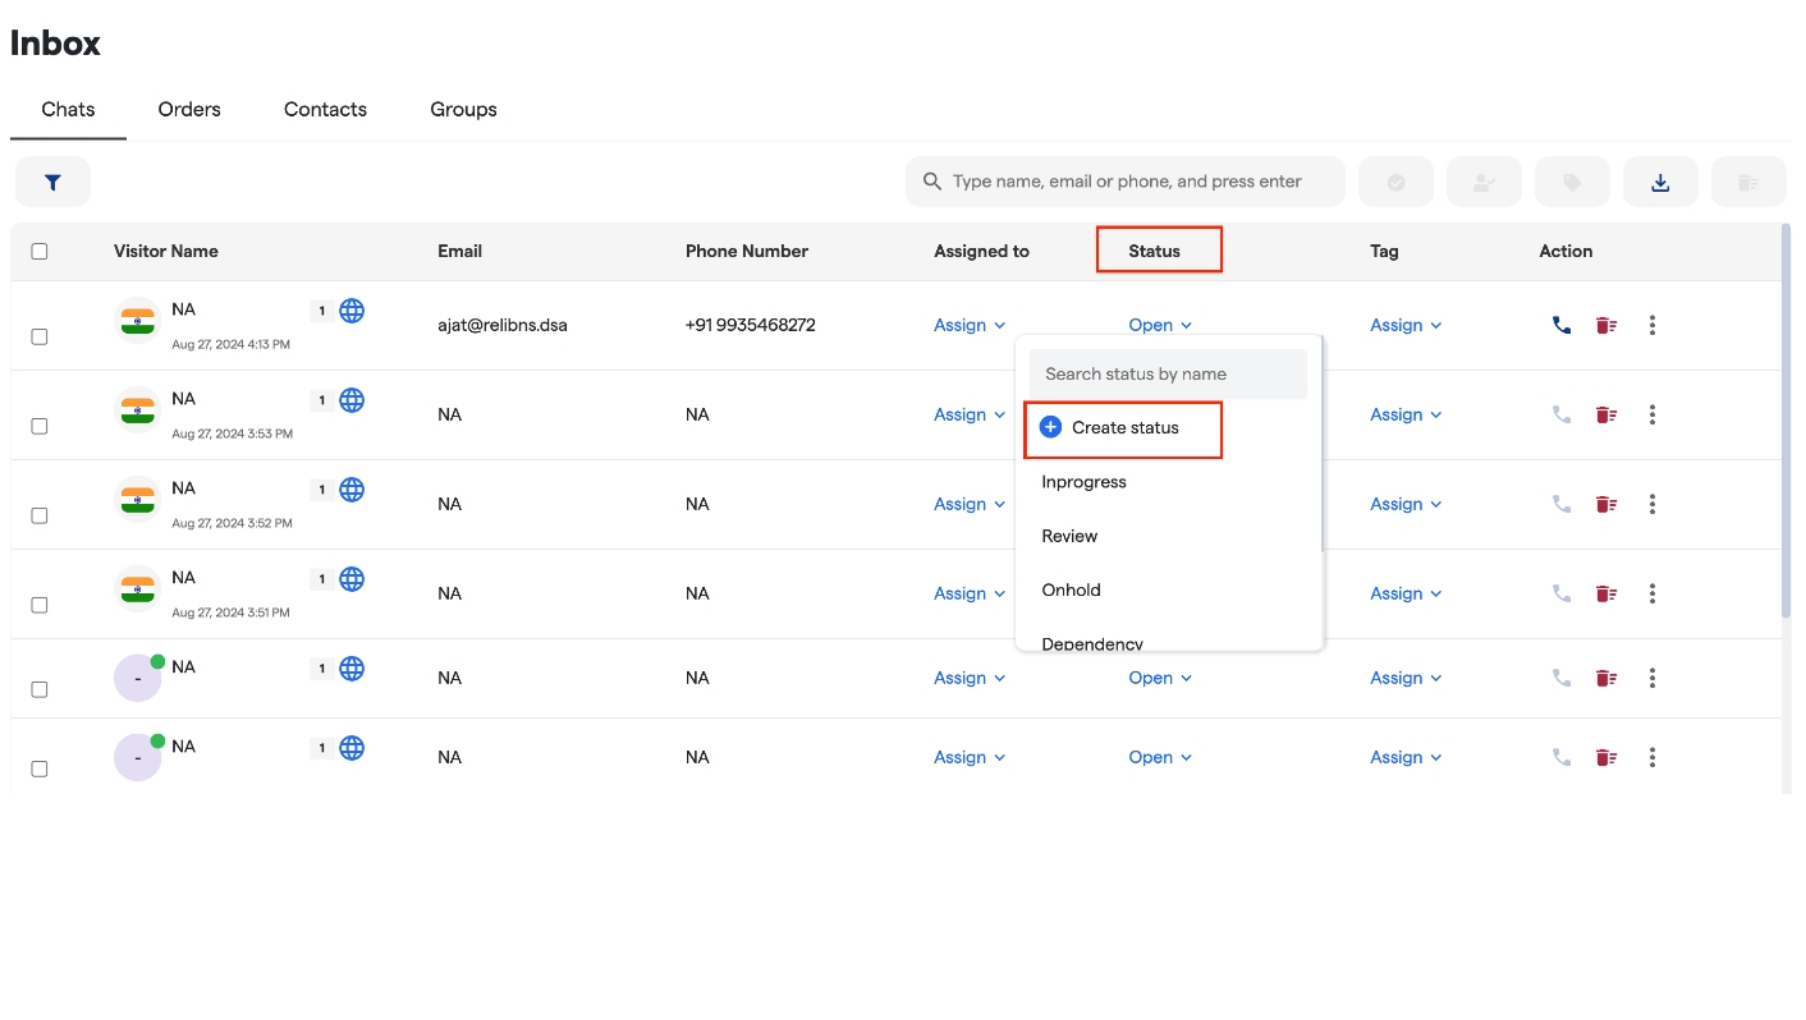
- Chat Status:
- Assign a status to each chat.
-
Create new status via the “Create Status” button in the dropdown menu.
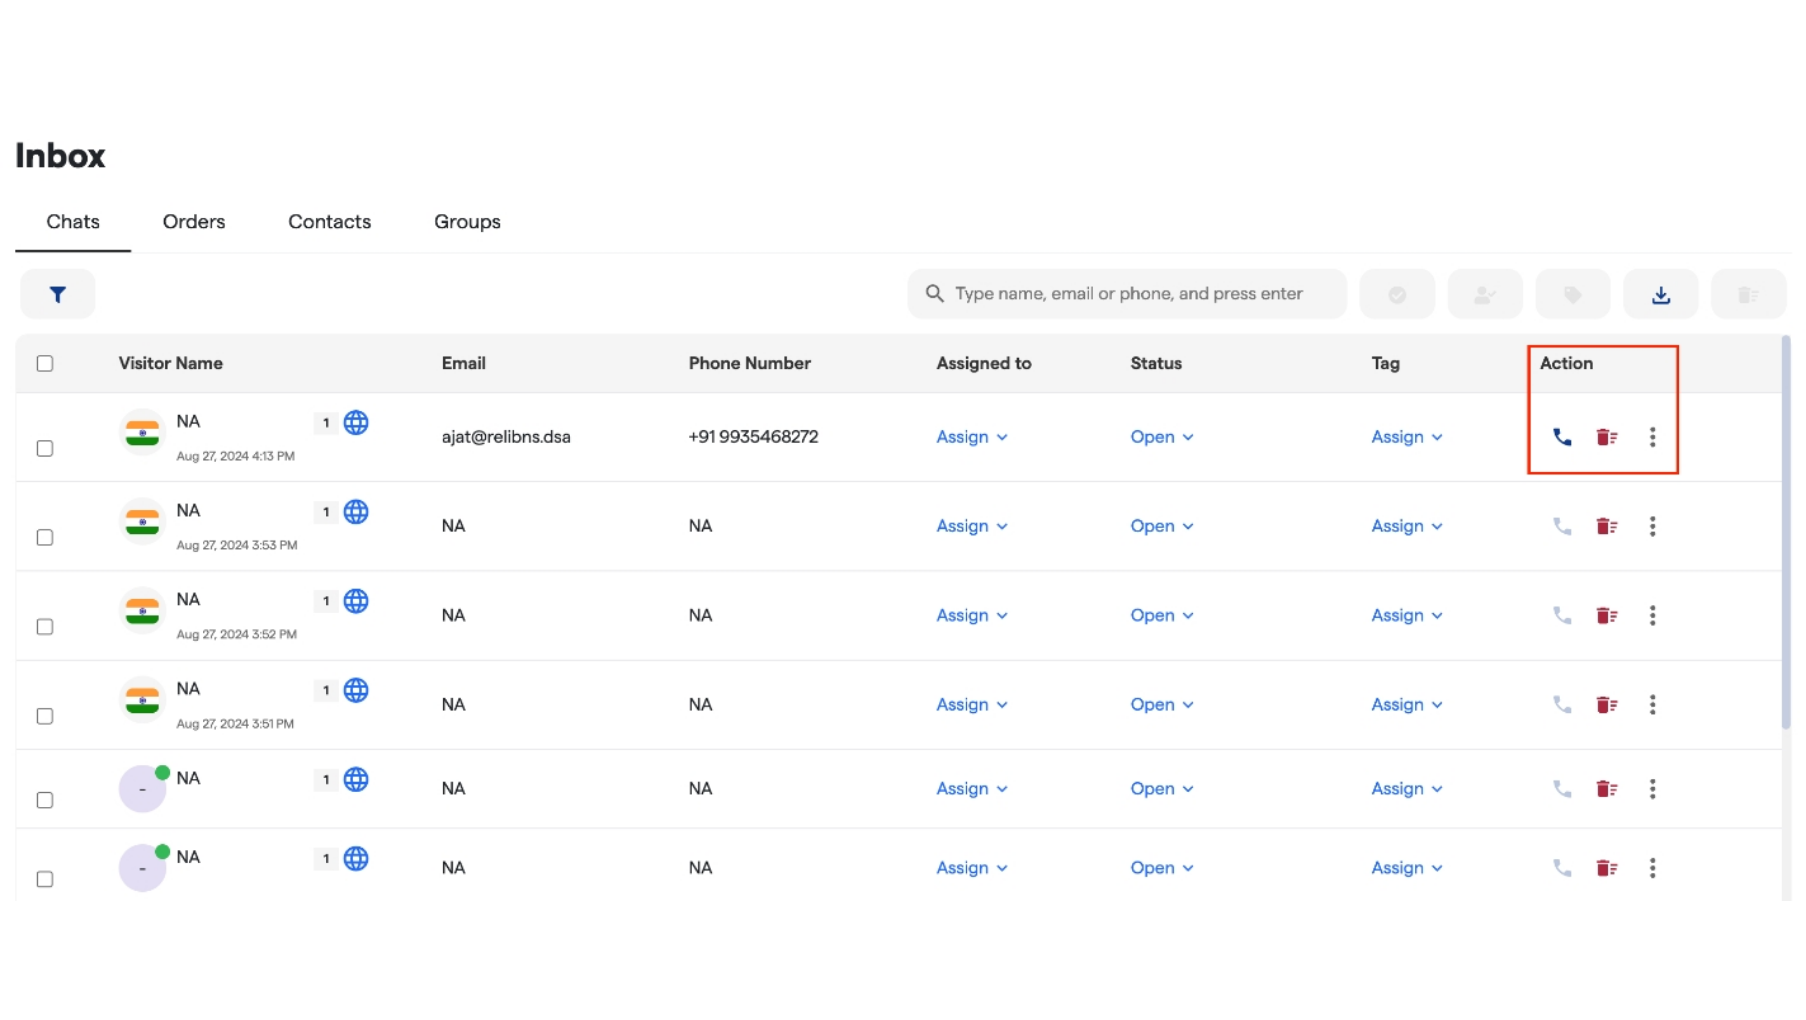
- Actions:
-
The action column contains buttons to Call, Delete, or Copy a user’s chat for further reference.
-
The action column contains buttons to Call, Delete, or Copy a user’s chat for further reference.
Chat Window Features
When you open a specific chat, several useful tools and information are available to manage conversations efficiently:Top Navbar Tools:
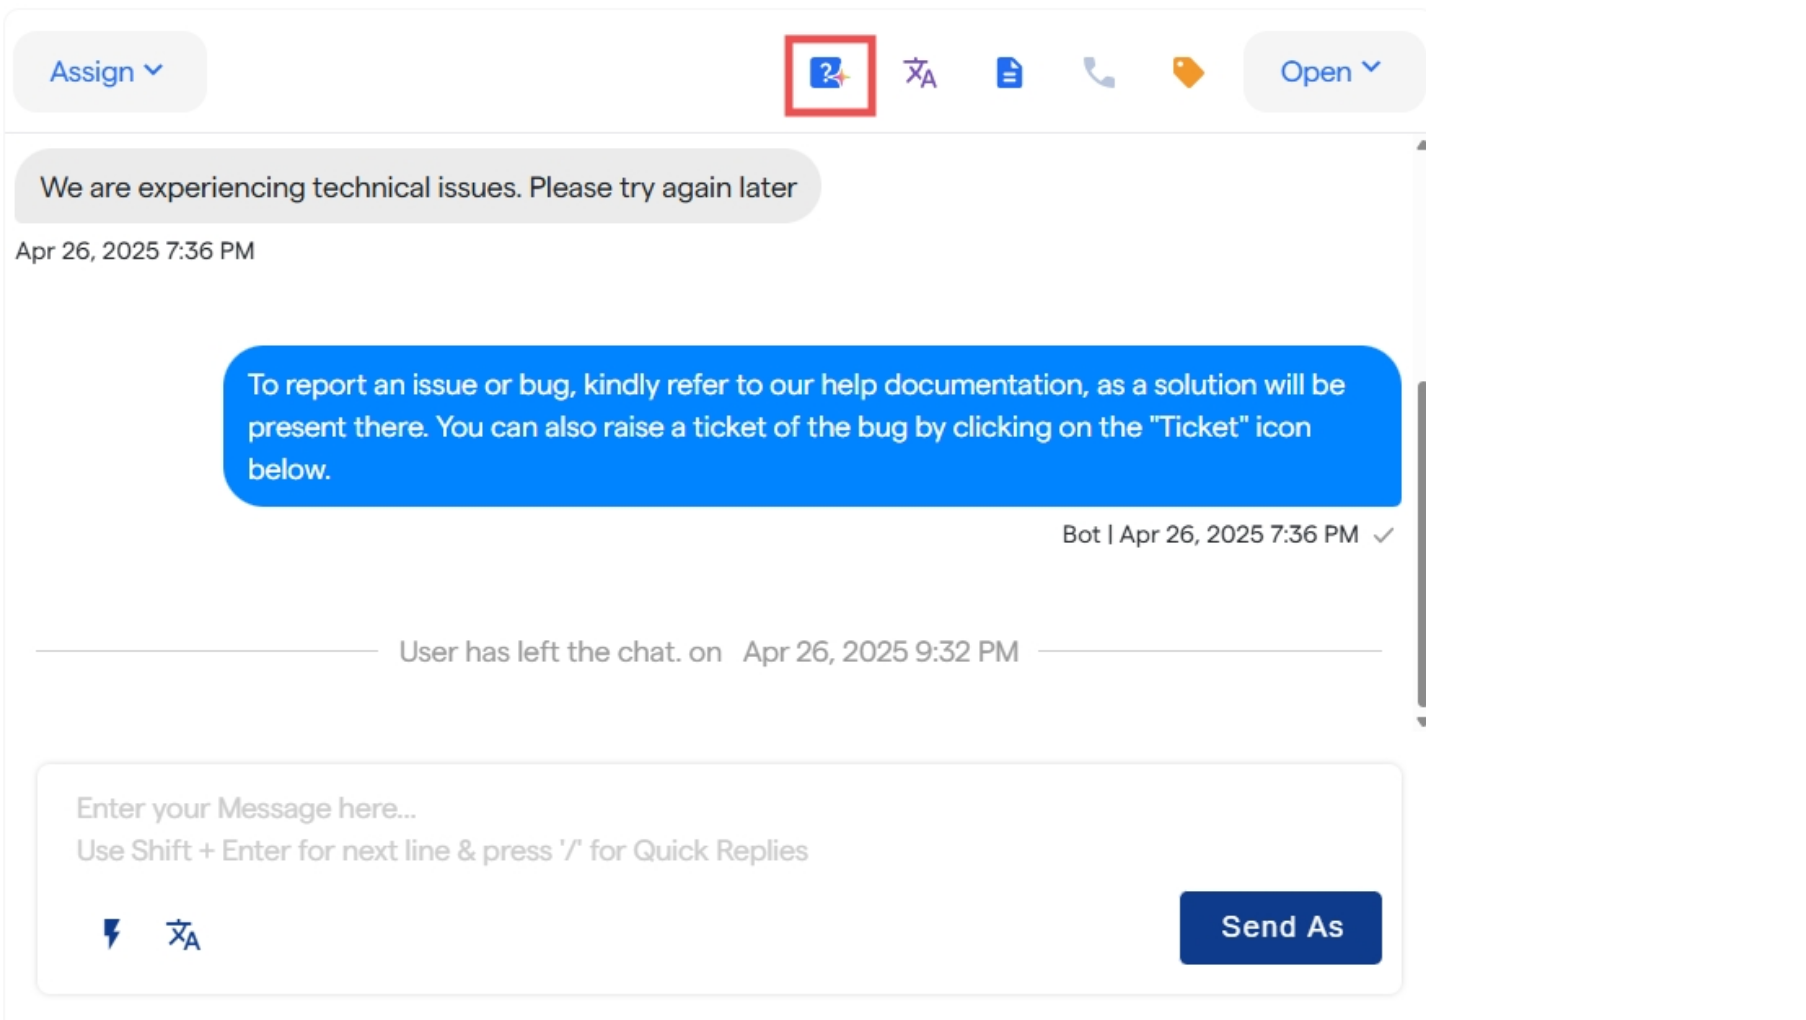
- Chat Translation:
- Instantly translate the chat into your preferred language with the Translate button.
- Transfer Chat:
- Transfer the current chat to another agent using the Transfer button.
- Download Chat Transcript:
- Download the entire chat history by clicking on the Download Transcript button.
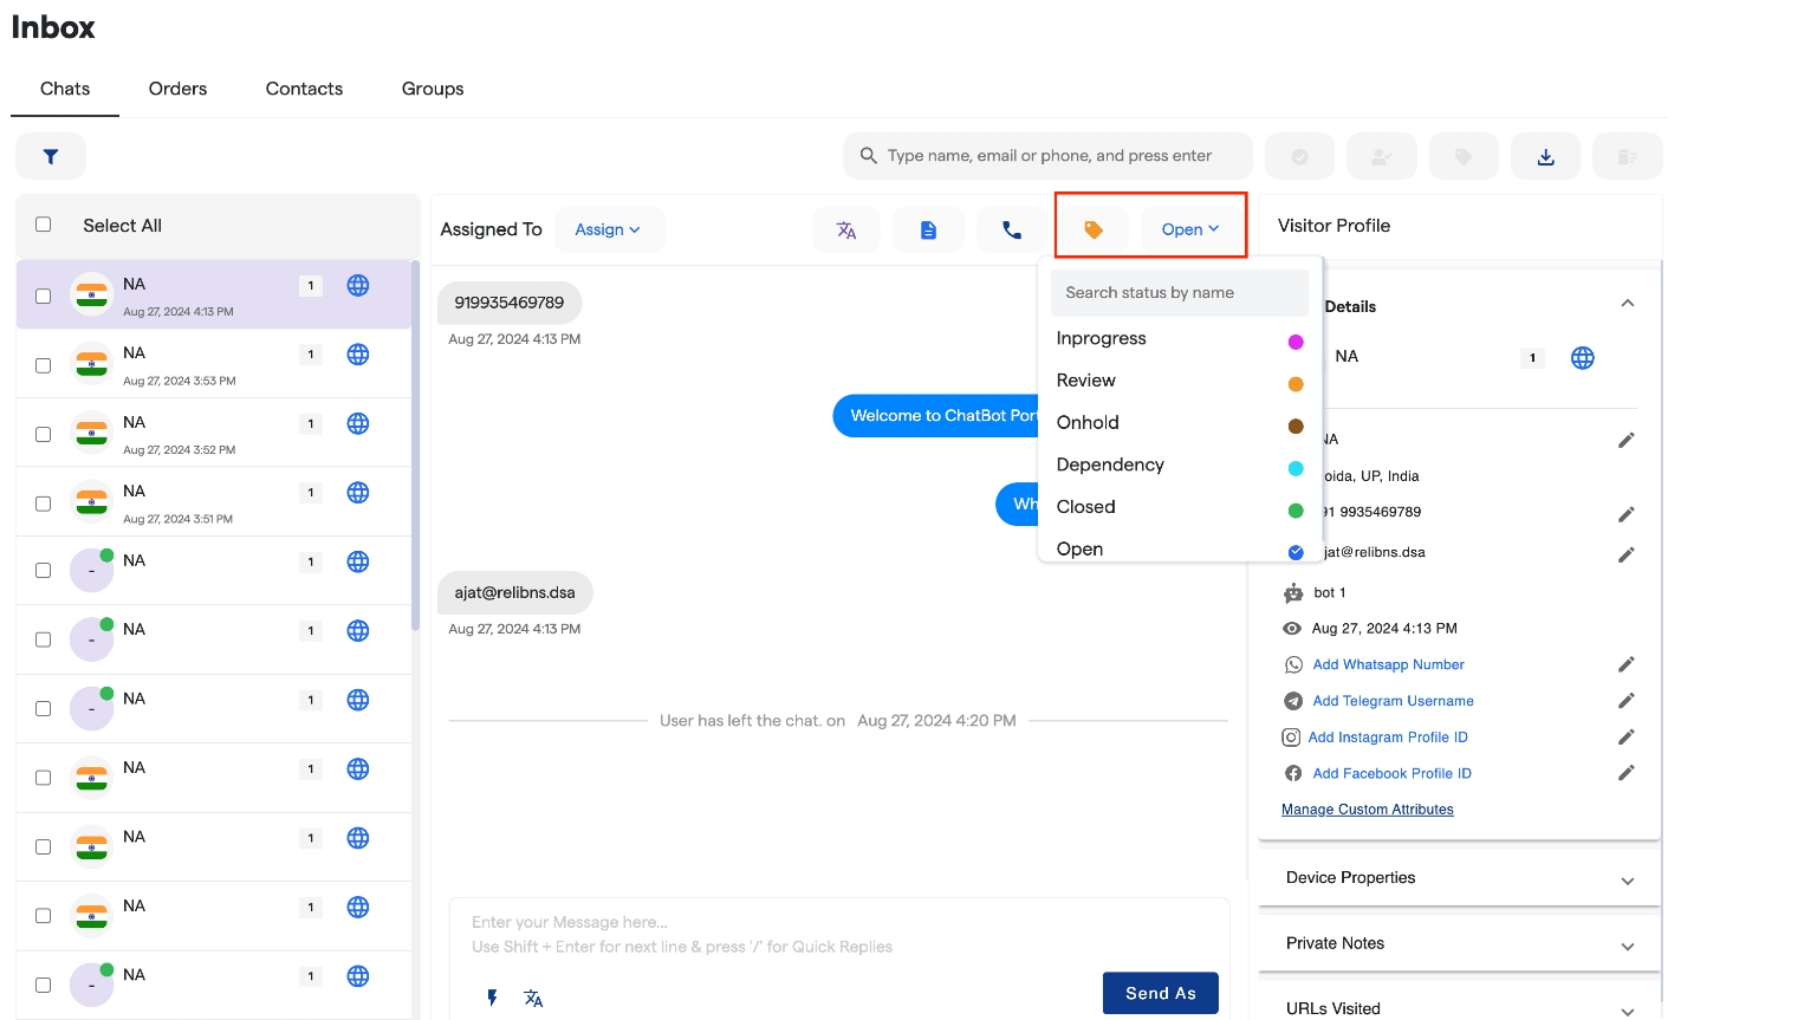
- Tag and Status Assignment:
-
Assign tags and status to the chat directly from this window. You can also create new tags or status using the provided options in the dropdown menus.
-
Assign tags and status to the chat directly from this window. You can also create new tags or status using the provided options in the dropdown menus.
- FAQ’s:
-
Directly train for FAQ’s using the icon given on the tab.
-
Directly train for FAQ’s using the icon given on the tab.
- Quick Replies
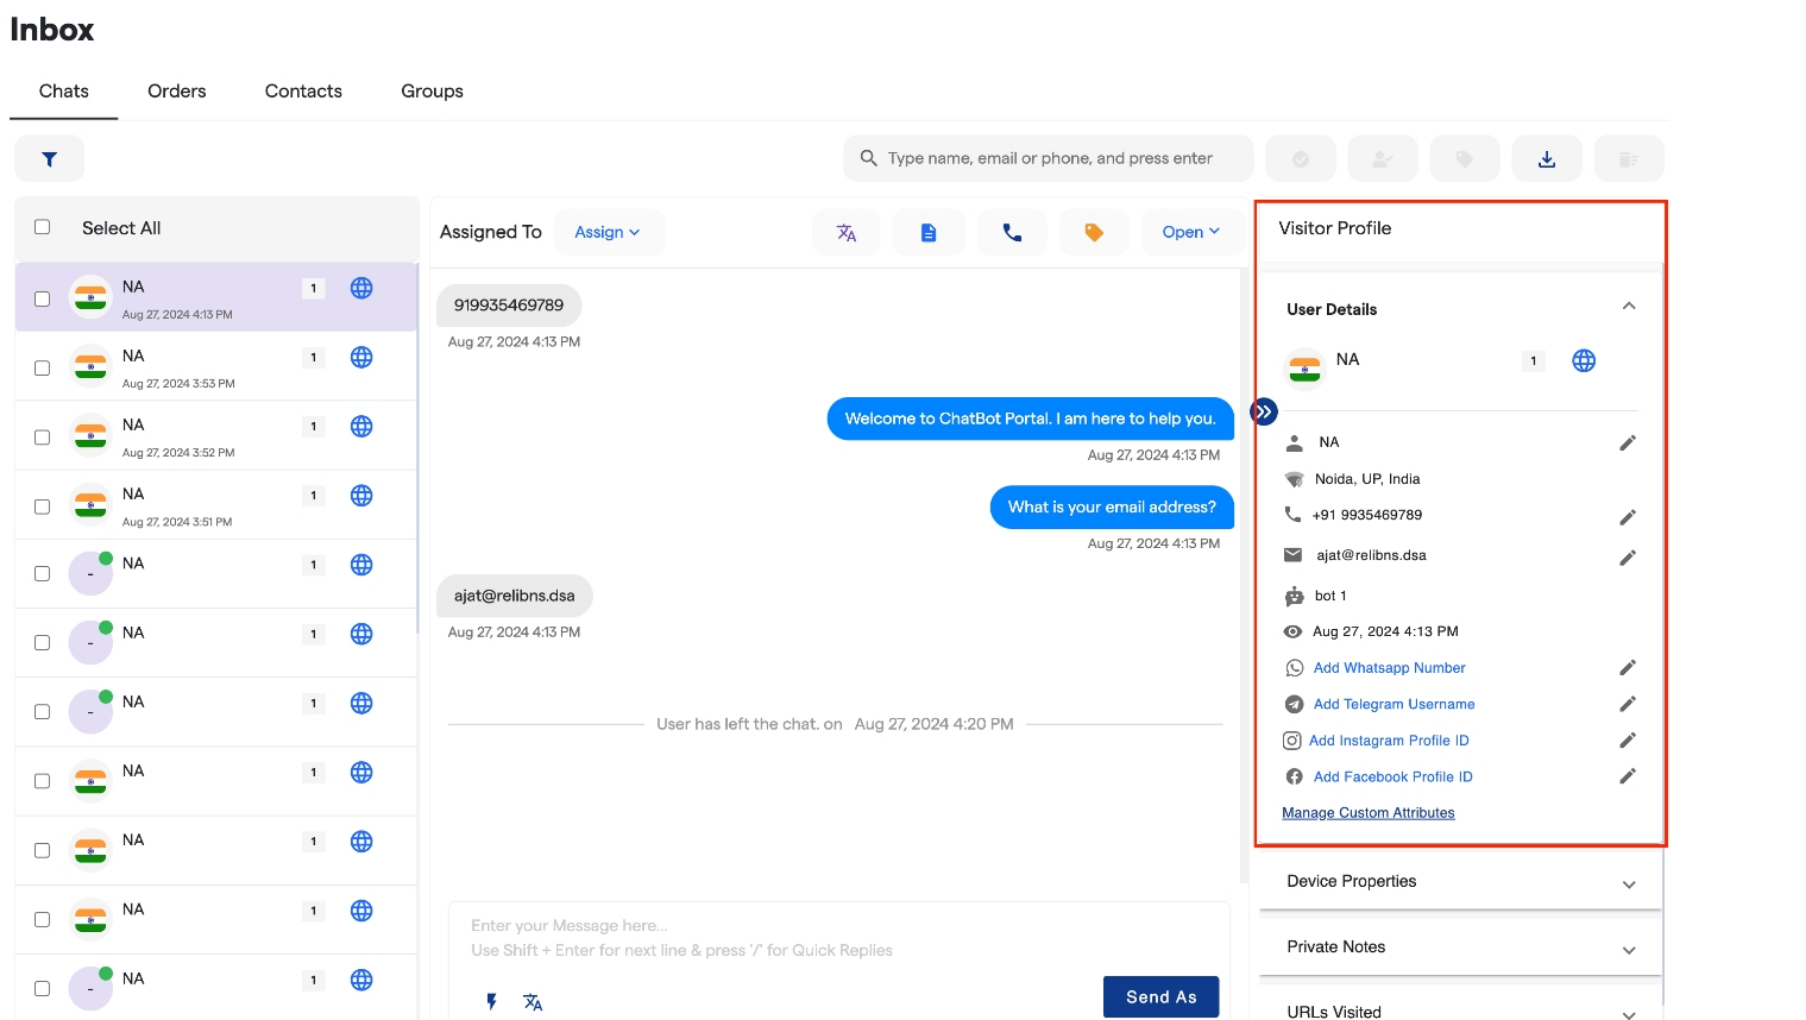
- The Visitor Profile section provides key details about the user interacting with the bot, including:
- Name
- Location
- Phone Number
-
Any custom attributes you’ve created, like preferences or additional details.
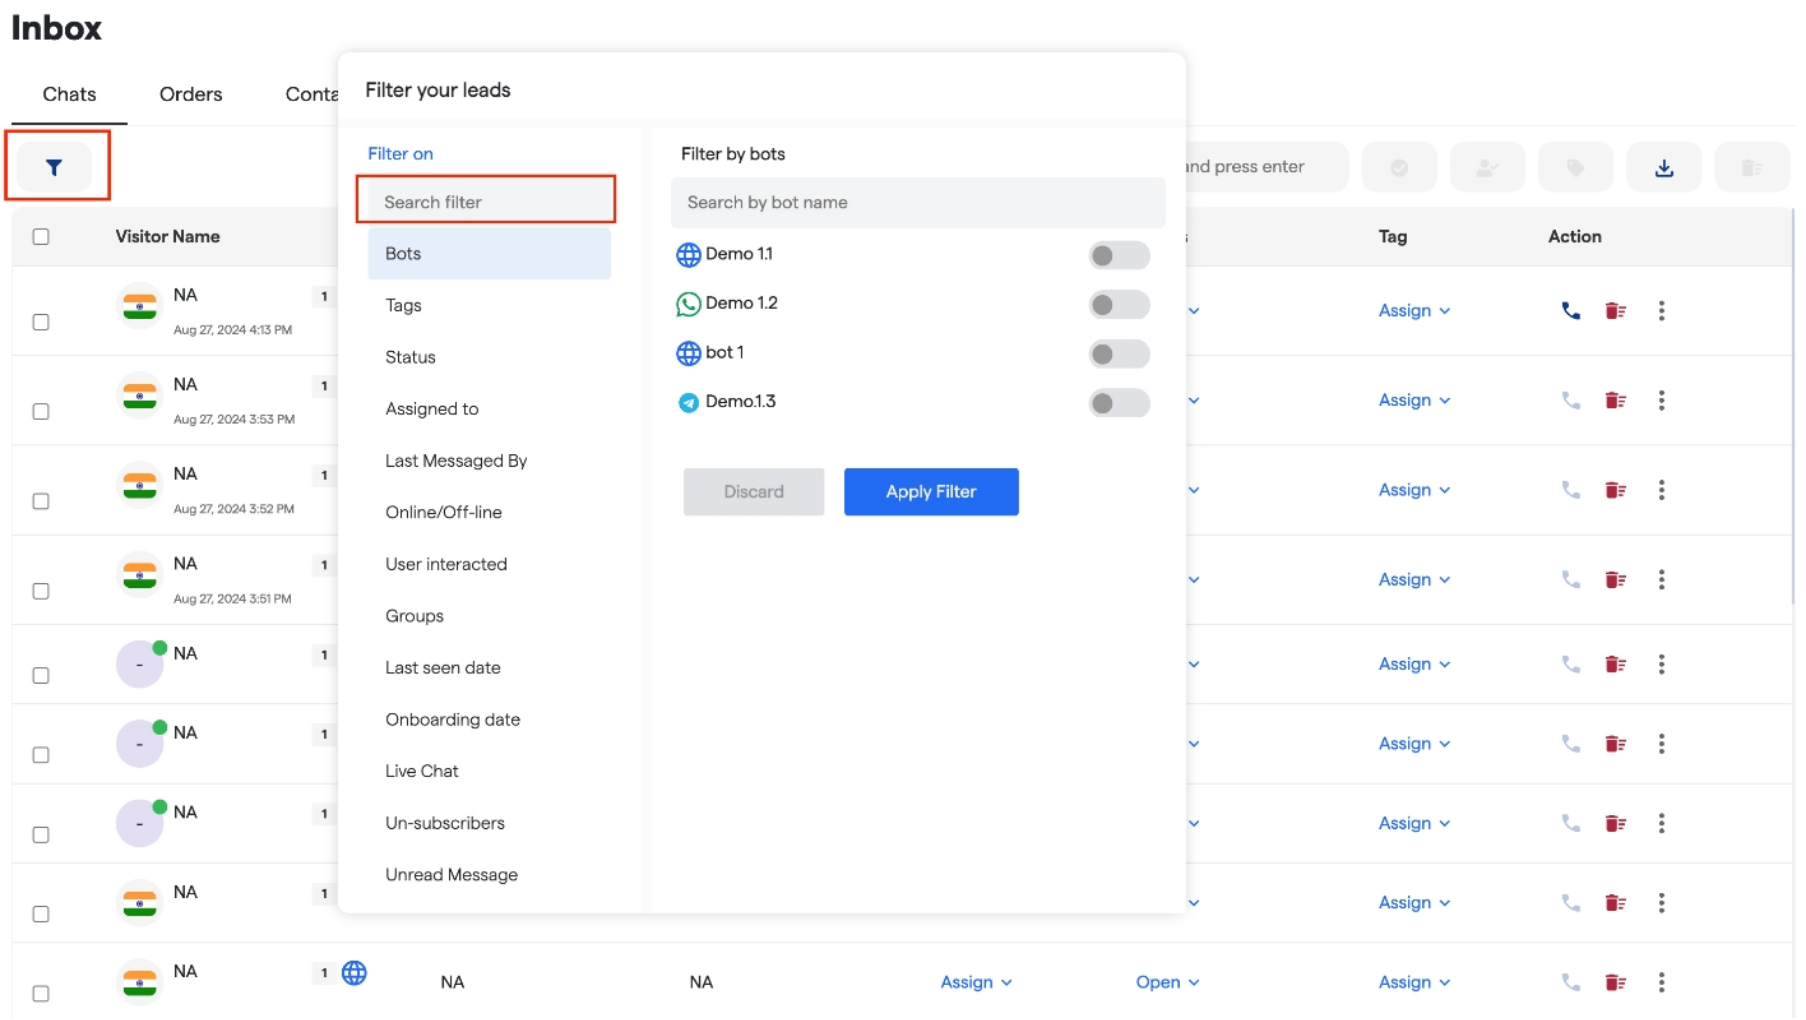
Using Filters in the Inbox Panel
The inbox panel provides various filters to help you segregate chats according to your needs. You can apply different filters to organize and manage your inbox efficiently.- Available Filters: Use filters based on parameters such as tags, status, assigned agent, and more to narrow down specific chats.
-
How to Apply Filters: Simply select the desired filter from the dropdown menu in the inbox panel, and the relevant chats will be displayed accordingly.